Amazon RDS SQL Server is a cloud database from Amazon, one of its differences from classic SQL Server is the way it performs backups. RDS SQL Server does not support the T-SQL BACKUP DATABASE construction but instead offers several other approaches such as restore point-in-time, snapshots, native backup to S3, and Export Data-tier Application.
Here are ways to perform a backup and restore:
Snapshot creation
The main tool offered by Amazon Web Services to perform backups is snapshot creation. This is a good solution to perform a hot backup, but there are two significant drawbacks. A snapshot is performed for the entire SQL Server instance but, not for a specific database. Also, there is no way to receive a backup file itself, it is stored on RDS servers, and it can be restored only on the RDS server.
Via AWS Management Console
Follow these steps to create a snapshot via AWS Management console:
Backup
-
-
- Go to the Amazon RDS page
- On the left pane click “Snapshots”
- Click on the “Take snapshot” button
- Choose “DBInstance” and specify the snapshot’s name
- Click on the “Take snapshot” button
-
Restore
-
-
- Go to the Amazon RDS page
- On the left pane click “Snapshots”
- Select a snapshot you want to restore
- Click on the “Action” > “Restore snapshot”
- Fill in the information to create a new RDS
If it is required to restore an existing RDS SQL Server instance then first remove it.
- Click on the “Restore Snapshot”
-
Via AWS CLI
A snapshot can be performed via Command Prompt using the AWS CLI utility. Note, a user configured in AWS CLI must be included in the AmazonRDSFullAccess group.
Backup
To create a snapshot, execute the following:
aws rds create-db-snapshot --db-instance-identifier <DB identifier> --db-snapshot-identifier <snapshot name>
In response, something similar to this should be received:
{
    "DBSnapshot": {
        "DBSnapshotIdentifier": "backup-5-3-2020",
        "DBInstanceIdentifier": "database-1",
        "Engine": "sqlserver-ex",
        "AllocatedStorage": 20,
        "Status": "creating",
        "Port": 1433,
        "AvailabilityZone": "us-east-1d",
        "VpcId": "vpc-03102ec7978f7ff8b",
        "InstanceCreateTime": "2020-03-20T11:54:50.858Z",
        "MasterUsername": "admin",
        "EngineVersion": "14.00.3223.3.v1",
        "LicenseModel": "license-included",
        "SnapshotType": "manual",
        "OptionGroupName": "default:sqlserver-ex-14-00",
        "PercentProgress": 0,
        "StorageType": "gp2",
        "Encrypted": false,
        "DBSnapshotArn": "arn:aws:rds:us-east-1:552663163906:snapshot:backup-5-3-2020",
        "IAMDatabaseAuthenticationEnabled": false,
        "ProcessorFeatures": [],
        "DbiResourceId": "db-UO6HQQ5ONIRHPHU72QXHP2CBJE"
    }
}
Restore
To restore a database from a snapshot, execute the following command:
aws rds restore-db-instance-from-db-snapshot --db-instance-identifier <DB identifier> --db-snapshot-identifier <snapshot name> --db-subnet-group-name <subnet group name>
Note, –db-subnet-group-name parameter should be specified, the needed values can be found by running aws rds describe-db-subnet-groups
Something similar to this should be received in response:
{
    "DBInstance": {
        "DBInstanceIdentifier": "database-5",
        "DBInstanceClass": "db.t2.micro",
        "Engine": "sqlserver-ex",
        "DBInstanceStatus": "creating",
        "MasterUsername": "admin",
        "AllocatedStorage": 20,
        "PreferredBackupWindow": "07:52-08:22",
        "BackupRetentionPeriod": 7,
        "DBSecurityGroups": [],
        "VpcSecurityGroups": [
            {
                "VpcSecurityGroupId": "sg-030ac53ed295429fb",
                "Status": "active"
            }
        ],
        "DBParameterGroups": [
            {
                "DBParameterGroupName": "default.sqlserver-ex-14.0",
                "ParameterApplyStatus": "in-sync"
            }
        ],
        "DBSubnetGroup": {
            "DBSubnetGroupName": "default-vpc-03102ec7978f7ff8b",
            "DBSubnetGroupDescription": "Created from the RDS Management Console",
            "VpcId": "vpc-03102ec7978f7ff8b",
            "SubnetGroupStatus": "Complete",
            "Subnets": [
                {
                    "SubnetIdentifier": "subnet-03bbe145f518226cb",
                    "SubnetAvailabilityZone": {
                        "Name": "us-east-1c"
                    },
                    "SubnetStatus": "Active"
                },
                {
                    "SubnetIdentifier": "subnet-0ce37a12925bd5864",
                    "SubnetAvailabilityZone": {
                        "Name": "us-east-1e"
                    },
                    "SubnetStatus": "Active"
                },
                {
                    "SubnetIdentifier": "subnet-0191b34946572bb0f",
                    "SubnetAvailabilityZone": {
                        "Name": "us-east-1b"
                    },
                    "SubnetStatus": "Active"
                },
                {
                    "SubnetIdentifier": "subnet-0ffd5cb199b27daa6",
                    "SubnetAvailabilityZone": {
                        "Name": "us-east-1a"
                    },
                    "SubnetStatus": "Active"
                },
                {
                    "SubnetIdentifier": "subnet-03a47697122e0b4f7",
                    "SubnetAvailabilityZone": {
                        "Name": "us-east-1f"
                    },
                    "SubnetStatus": "Active"
                },
                {
                    "SubnetIdentifier": "subnet-015e10c2ae3e9a2bd",
                    "SubnetAvailabilityZone": {
                        "Name": "us-east-1d"
                    },
                    "SubnetStatus": "Active"
                }
            ]
        },
        "PreferredMaintenanceWindow": "fri:03:12-fri:03:42",
        "PendingModifiedValues": {},
        "MultiAZ": false,
        "EngineVersion": "14.00.3223.3.v1",
        "AutoMinorVersionUpgrade": false,
        "ReadReplicaDBInstanceIdentifiers": [],
        "LicenseModel": "license-included",
        "OptionGroupMemberships": [
            {
                "OptionGroupName": "default:sqlserver-ex-14-00",
                "Status": "pending-apply"
            }
        ],
        "CharacterSetName": "SQL_Latin1_General_CP1_CI_AS",
        "PubliclyAccessible": false,
        "StorageType": "gp2",
        "DbInstancePort": 0,
        "StorageEncrypted": false,
        "DbiResourceId": "db-MKXHALKYXHU3M44UPZA3ABEFSQ",
        "CACertificateIdentifier": "rds-ca-2019",
        "DomainMemberships": [],
        "CopyTagsToSnapshot": false,
        "MonitoringInterval": 0,
        "DBInstanceArn": "arn:aws:rds:us-east-1:552663163906:db:database-5",
        "IAMDatabaseAuthenticationEnabled": false,
        "PerformanceInsightsEnabled": false,
        "DeletionProtection": false,
        "AssociatedRoles": []
    }
}
Native backup to S3
For the RDS SQL Server instance, it can be performed a native backup by saving it to S3. The RDS engine does not support the BACKUP DATABASE construct and by executing it, an error message appears. Use the following stored procedure [msdb]. [Dbo]. [Rds_backup_database] to perform a native backup.
Backup
Before the creation of a backup, allow the RDS server to keep backups on S3. This can be set by the following steps:
-
-
-
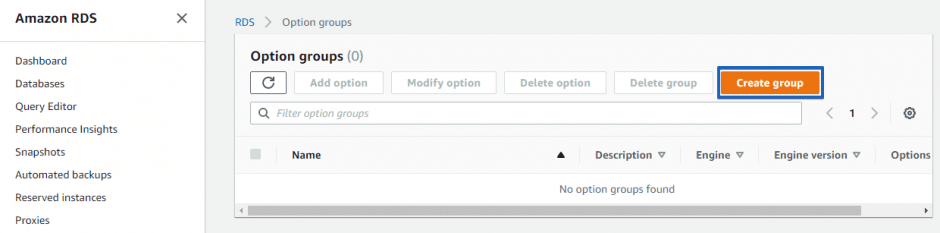
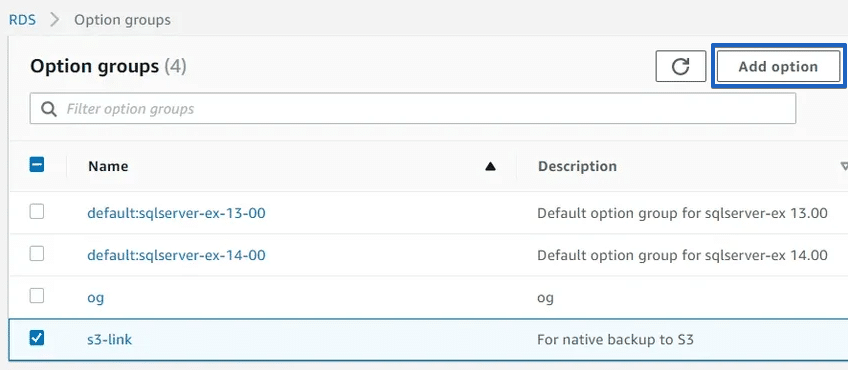
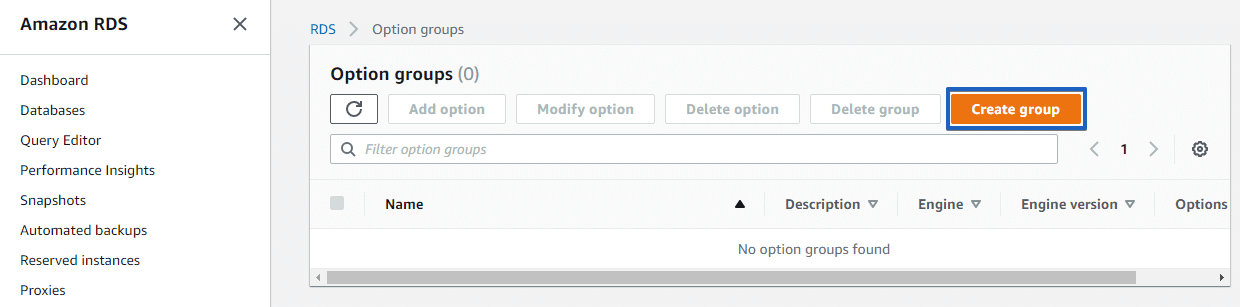
Open AWS RDS Console and go to the Option Groups section
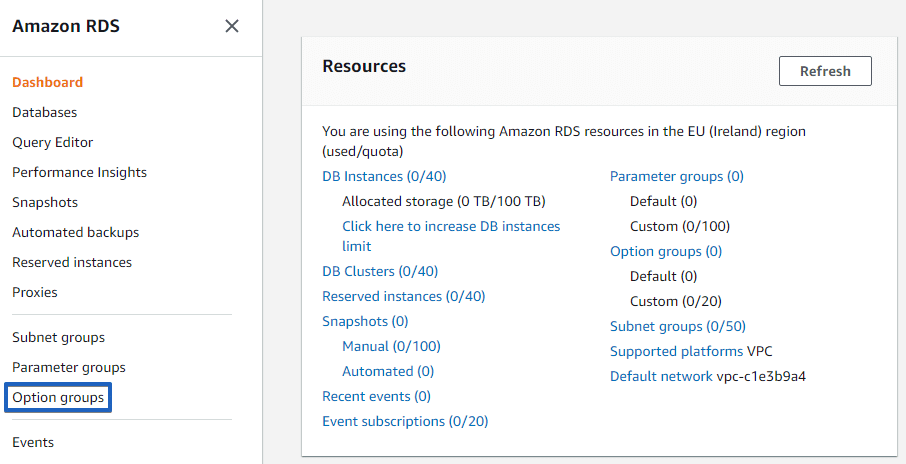
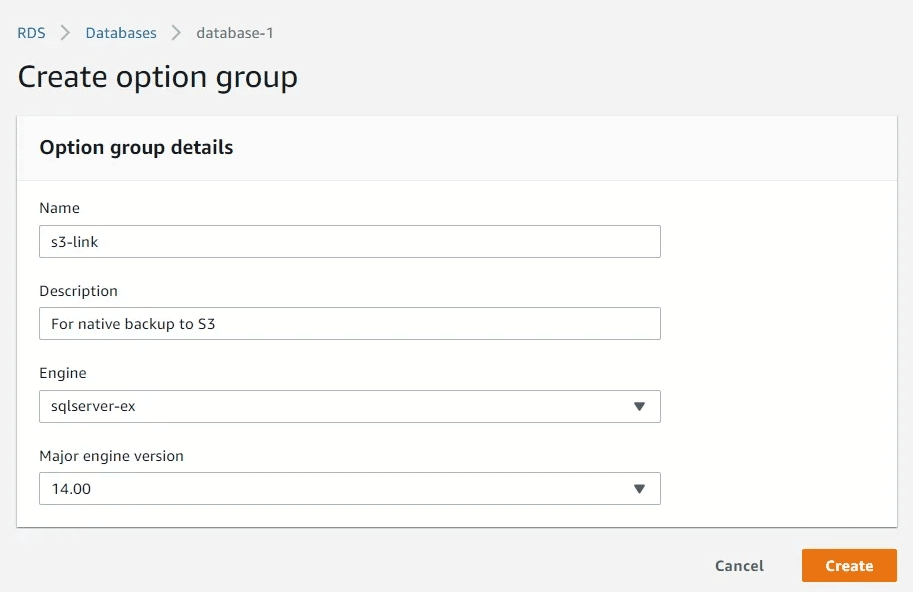
- Create “Option group”
- Specify the appropriate “Engine Version” and “Engine”
- Add the option to that group
- Specify “SQLSERVER_BACKUP_RESTORE” and choose to create a new role in the “IAM role” section. In this case, the role with all the necessary permissions will be created.
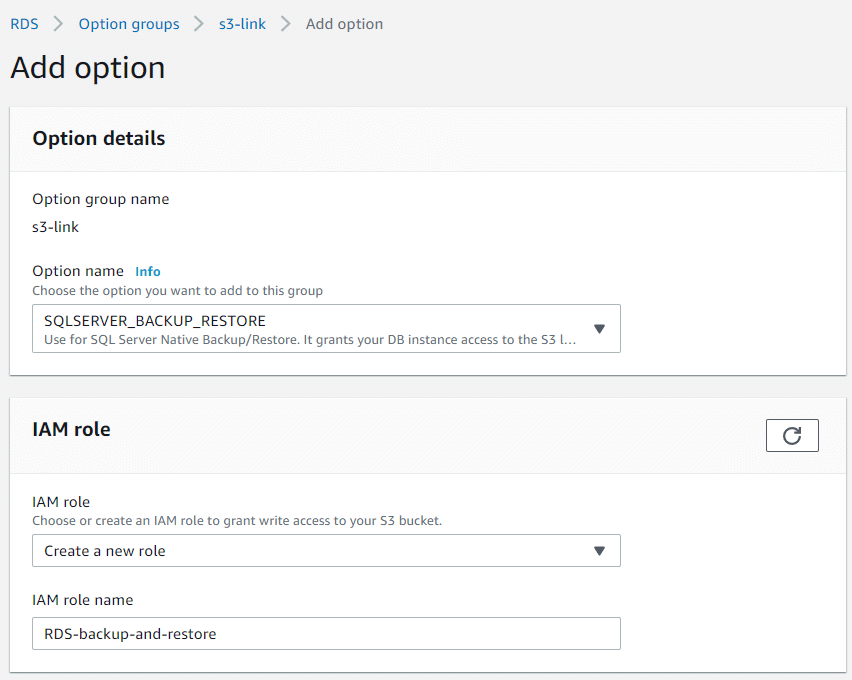
- Specify a bucket where you prefer to store your backups at the “S3 Destination” section and click on the “Add Option”

- Now set the “Option Group” option at a database’s settings. To do this choose a database from the list and click “Modify”. At the “Database Option” section, specify the “Option Group” that was created.
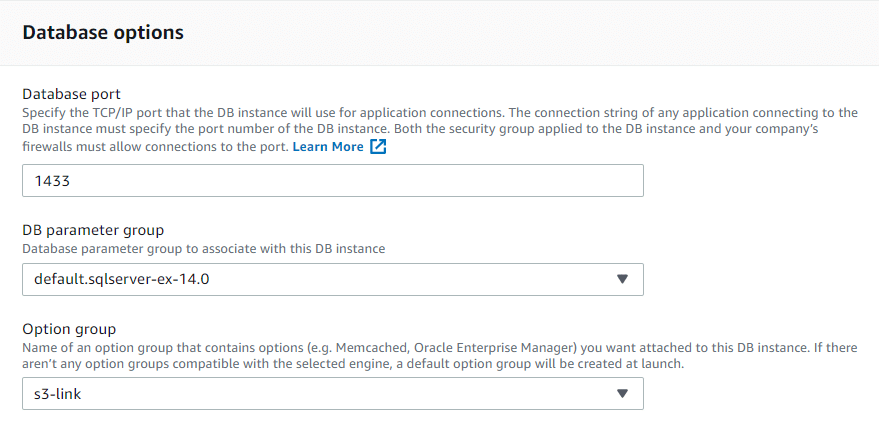
- Apply the changes
-
Open AWS RDS Console and go to the Option Groups section
-
Now everything is set. As a rule, it takes about fifteen minutes to have all settings applied, even if “apply immediately” was chosen.
Backups and restores are performed via T-SQL commands. The easiest way to do this is to use SQL Server Management Studio.
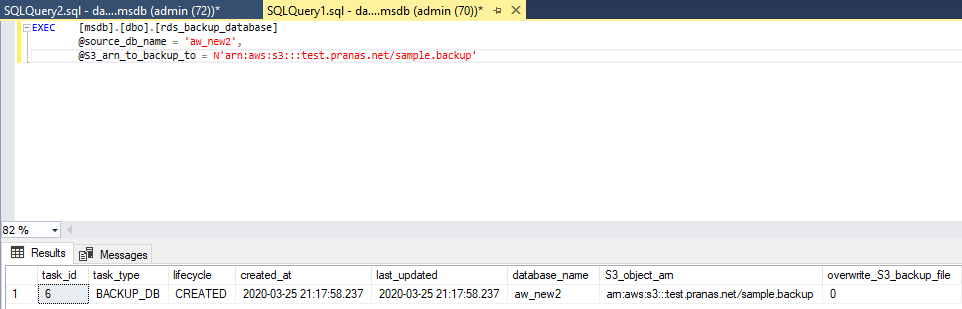
To perform a backup, please execute the following T-SQL command:
EXEC [msdb].[dbo].[rds_backup_database]
@source_db_name = '<database name>',
@S3_arn_to_backup_to = N'arn:aws:s3:::<bucket name>/sample.backup'
If successful, a table in which information about the created backup task will be displayed:
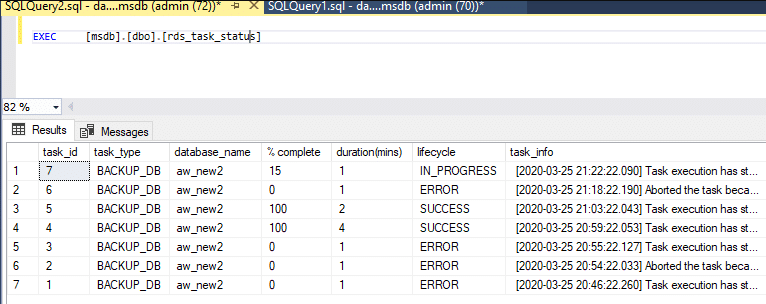
To track the backup process, execute another procedure EXEC [msdb]. [Dbo]. [Rds_task_status]
Restore
To restore a database, execute the following T-SQL script:
exec msdb.dbo.rds_restore_database
@restore_db_name='<database name>',
@s3_arn_to_restore_from='arn:aws:s3:::<bucket name>/sample.backup';
More details about the native backup/restore on S3 can be found here.
Export bacpac\dacpac
One of the ways to backup the RDS server is to export a database. This method allows users to receive the database directly to the local machine, however, the “Export Data-tier Application” has an important drawback: By default, it does not guarantee the transactional consistency of the exported data. For the backup to be transactionally consistent, you need to put the database in a read-only mode for the duration of the backup.
Via SSMS (SQL Server Management Studio)
Backup
Bacpac export can be performed via SSMS. Note, the database should be in read-only mode. This can be set by the following T-SQL query.
ALTER DATABASE [<dbname>] SET READ_ONLY WITH ROLLBACK AFTER 5
To export a database, please follow these instructions:
-
-
- Open SSMS and connect to Amazon RDS SQL Server
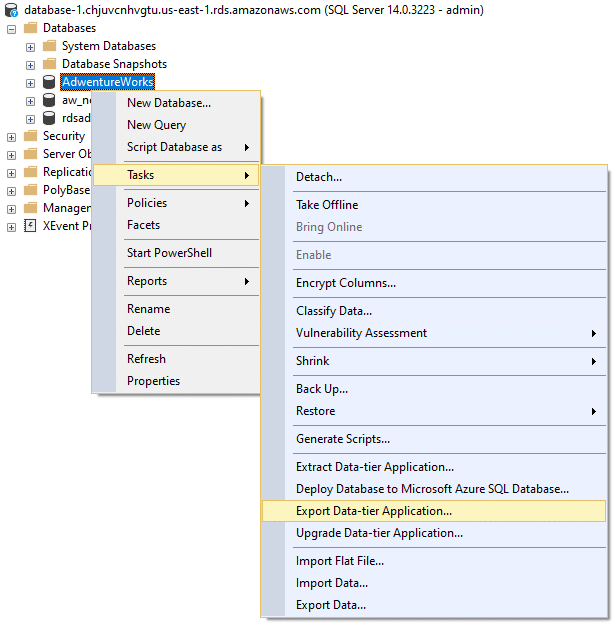
- Right-click on the database in “Object Explorer” and select “Export Data-tier Application”
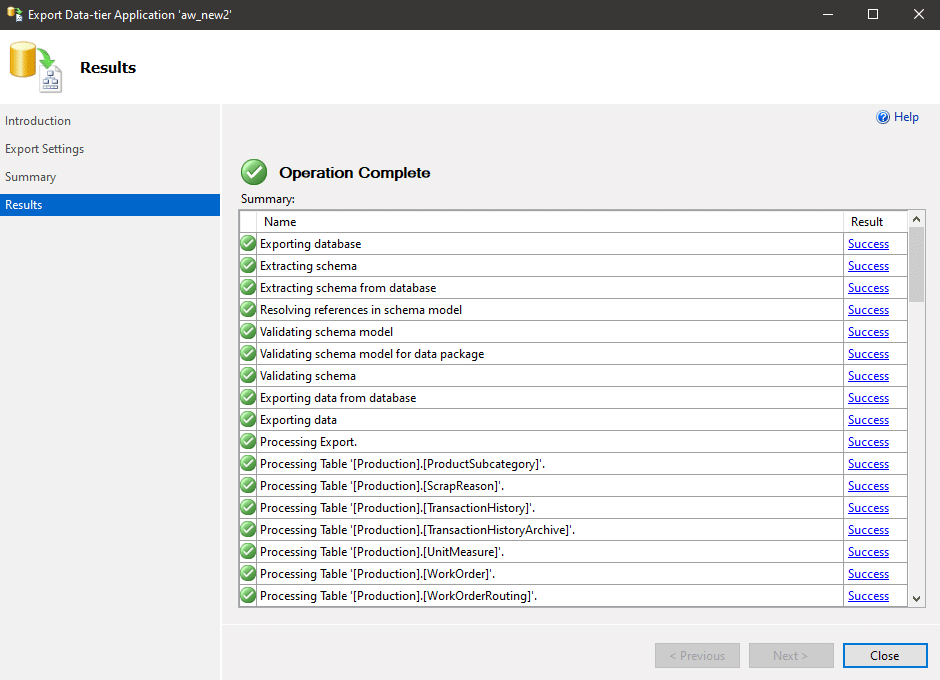
- Specify a path where the backups should be stored, click “Next” and “Finish”

- If successful, the following will be displayed:
- Set the database to read-write mode by executing the following T-SQL command:
ALTER DATABASE [<dbname>] SET READ_WRITE WITH ROLLBACK AFTER 5
-
Restore
To import a database, please follow these steps:
-
-
- Open SSMS and connect to Amazon RDS SQL Server
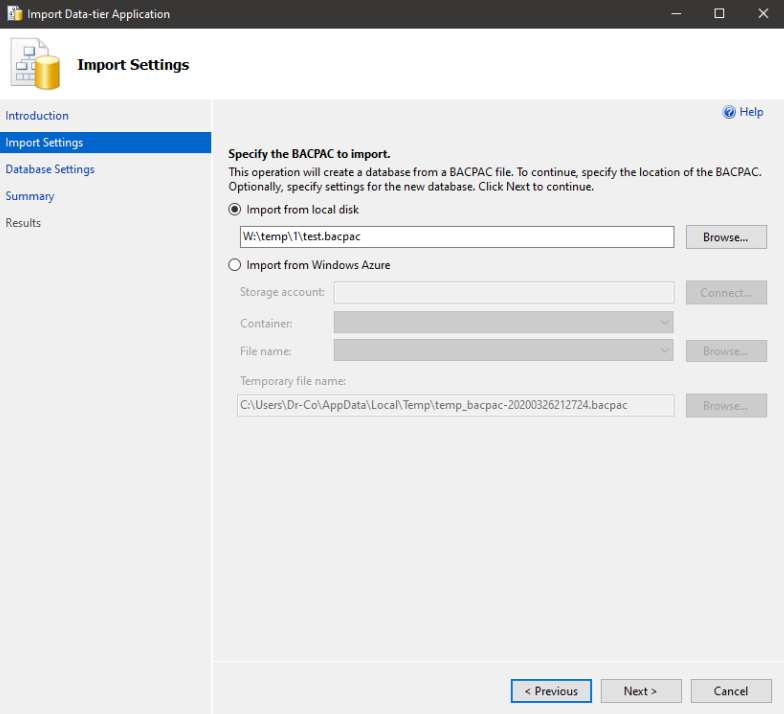
- Right-click on “Databases” and select “Import Data tier-Application”

- Specify the path to the bacpac file
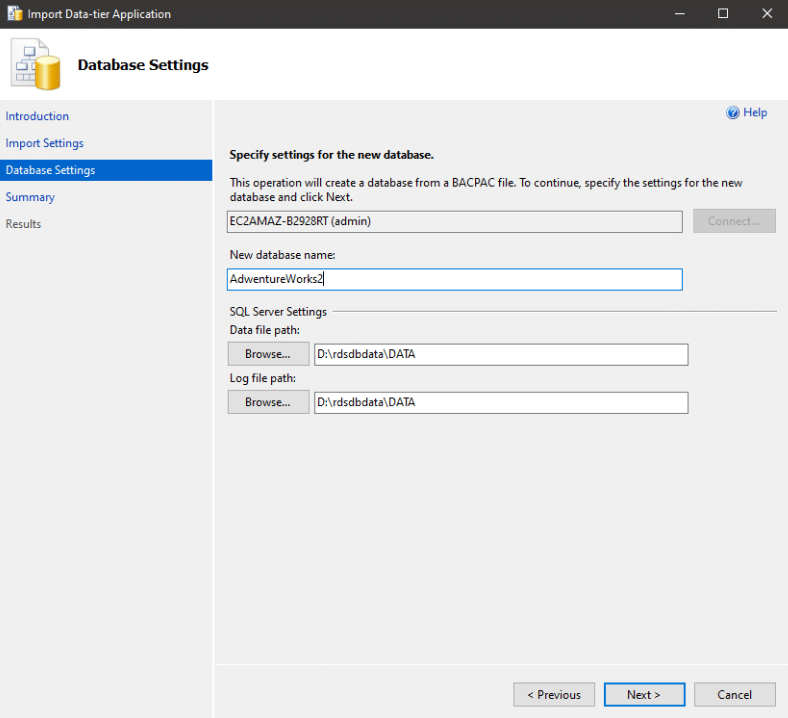
- Then specify the name of the database. Leave the default values for “Data file path” and “Log file path”.
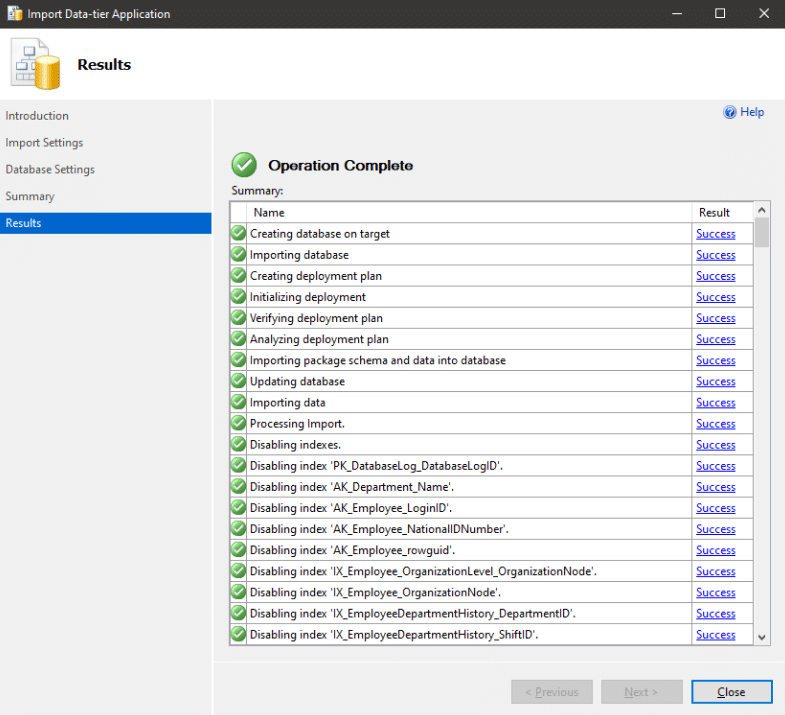
- If everything goes well the following will be displayed
- Set the restored database into the read-write mode, by executing the following T-SQL command:
ALTER DATABASE [<dbName>] SET READ_WRITE WITH ROLLBACK AFTER 5
-
Via SqlPackage
SqlPackage.exe is a utility from Microsoft which allows you to import/export SQL databases. You can download and get more information about it at this link.
This utility can perform several types of export. The most suitable for RDS server is the Extract dacpac with ExtractAllTableData = True option.
Backup
It is recommended to set the target database to read-only mode and then return it to read-write mode, as described above to perform a transactionally consistent backup.
To export, execute the following command, specifying the database as well as the data for the connection
sqlpackage.exe /action:Extract /SourceServerName:<RDS Server name> /SourceDatabaseName:<db name> /SourceUser:admin /SourcePassword:<password> /TargetFile:<patch to target .dacpac> /p:ExtractAllTableData=True
Restore
To restore the database, run the following command:
sqlpackage.exe /action:Publish /TargetServerName:<RDS Server name> /TargetDatabaseName:<db name> /TargetUser:admin /TargetPassword:<password> /SourceFile:<patch to source .dacpac> /p:TreatVerificationErrorsAsWarnings=True
That’s it!
Via SQLBackupAndFTP
SQLBackupAndFTP backups and restores the RDS server by saving it to Local Folder, FTP, or other cloud storage. The application has many functions such as sending email notifications, compressing backups, scheduled backups, and much more.
Similar to the previous method, for transactional consistency it is necessary to set the database to read-only mode for the duration of the backup. This can be done in the backup job’s advanced settings.
Backup
-
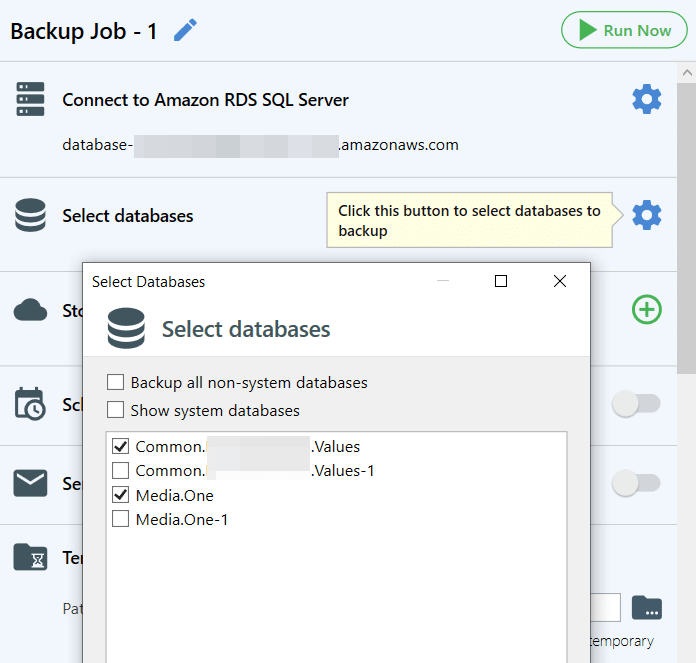
After installation, add a connection to the RDS server

-
Select the databases that should be backed up
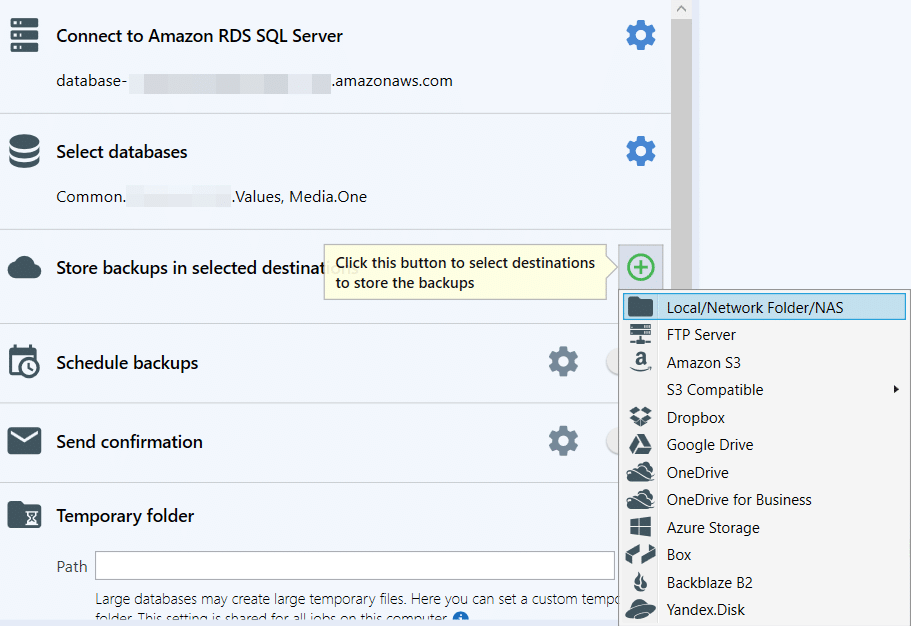
-
Choose a destination place for the backups and click “Run Now”
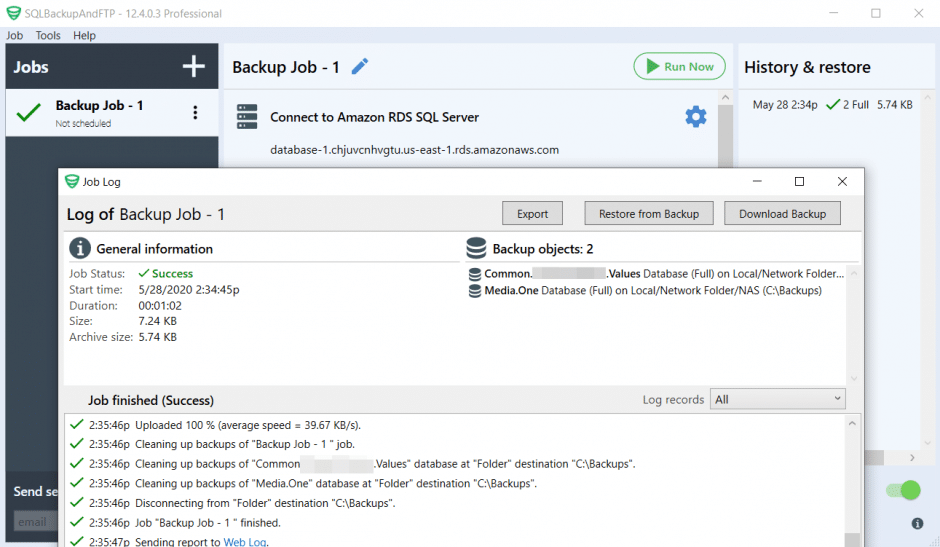
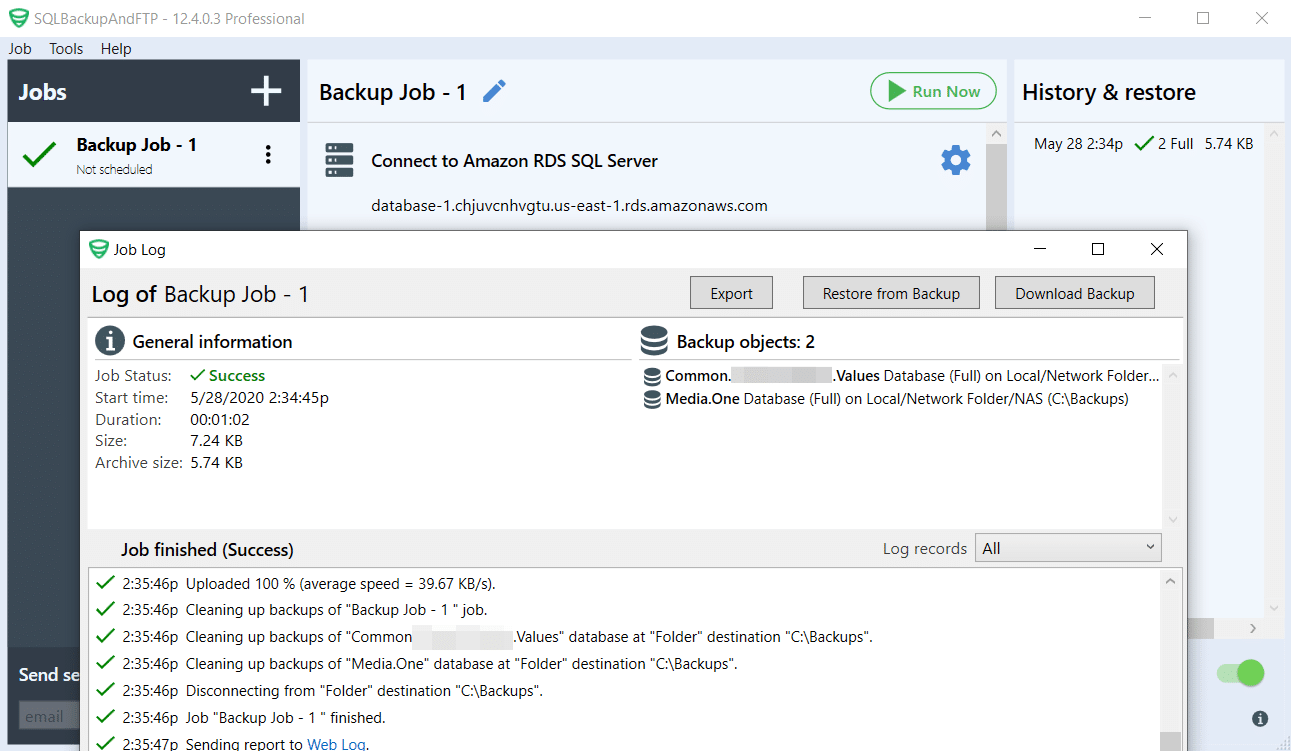
-
If everything goes well, the following progress log will be displayed
Restore
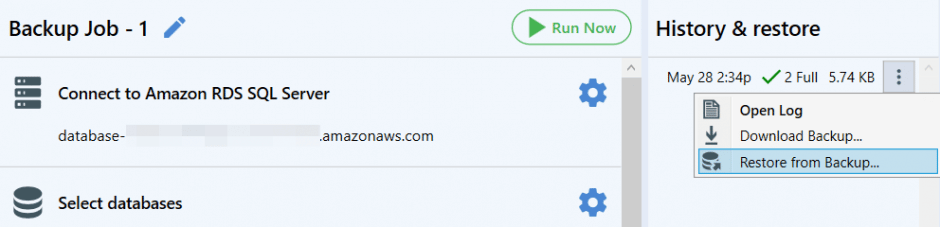
-
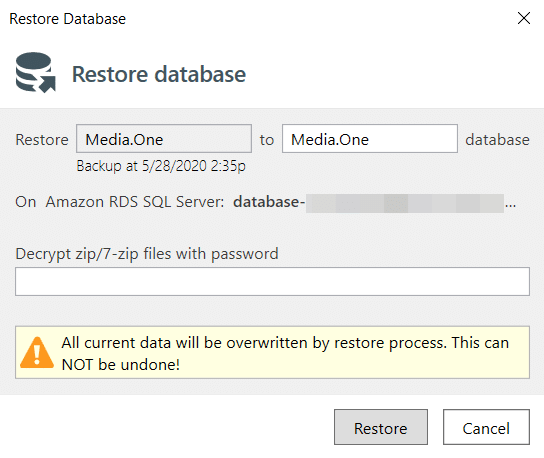
To perform a restore process, open the progress log and click the “Restore from Backup” button
- Choose the database that should be restored

- On the following form, specify a name for the database to be restored and click the “Restore” button. If the database exists, it will be overwritten