 With the release of SQLBackupAndFTP version 12, database administrators can now easily back up MySQL Server databases.
If you are already using SQLBackupAndFTP to back up SQL Server databases, you will be pleased to learn that the procedure to back up MySQL databases is almost identical. The only major difference is that you need to specify MySQL Server as the server type when you connect to the database server. SQLBackupAndFTP supports 2 methods for connecting to MySQL databases: TCP/IP and phpMyAdmin. TCP/IP (via port 3306) is the de-facto standard for connecting to a MySQL database server. Connecting via phpMyAdmin, on the other hand, is necessary if you don’t have direct access to your MySQL server, for instance. if your website is being hosted on a shared hosting platform.
SQLBackupAndFTP creates MySQL backups using the standard mysqldump utility. The utility creates a SQL script file that can be executed to reproduce the original database. At the moment, only full MySQL backups are supported by SQLBackupAndFTP.
If you’re new to SQLBackupAndFTP, below you can find a simple tutorial on how to backup MySQL databases.
1. Connect to MySQL Server
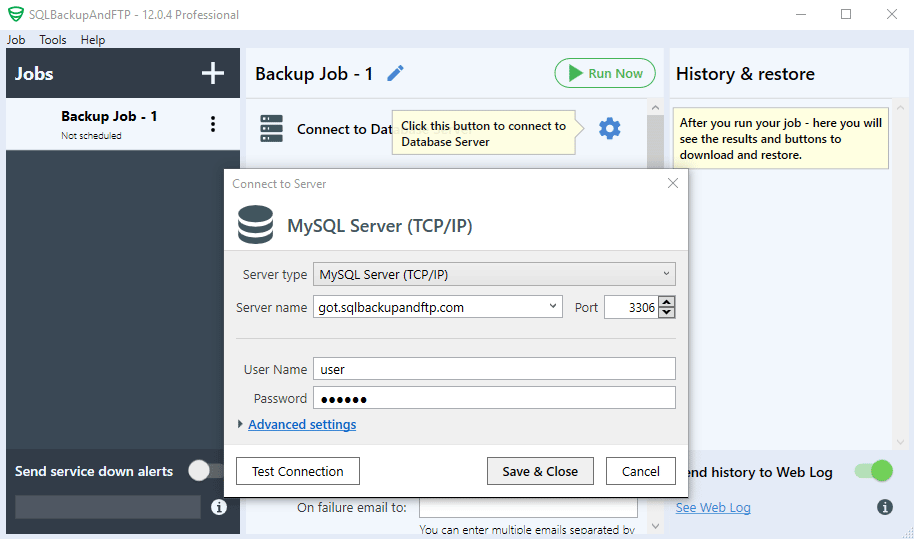
First of all, you need to click the gear icon next to the “Connect to Database Server” test. In the popup opened, you can choose to either connect to your MySQL Server via TCP/IP or via phpMyAdmin (see “Server type” field). In our example, we choose the TCP/IP connection. Then, you need to specify the server’s name (URL), MySQL user name, and password. You can test the connection right away by clicking the “Test Connection” button. If everything is working, click the “Save & Close” button.
2. Select databases for backup
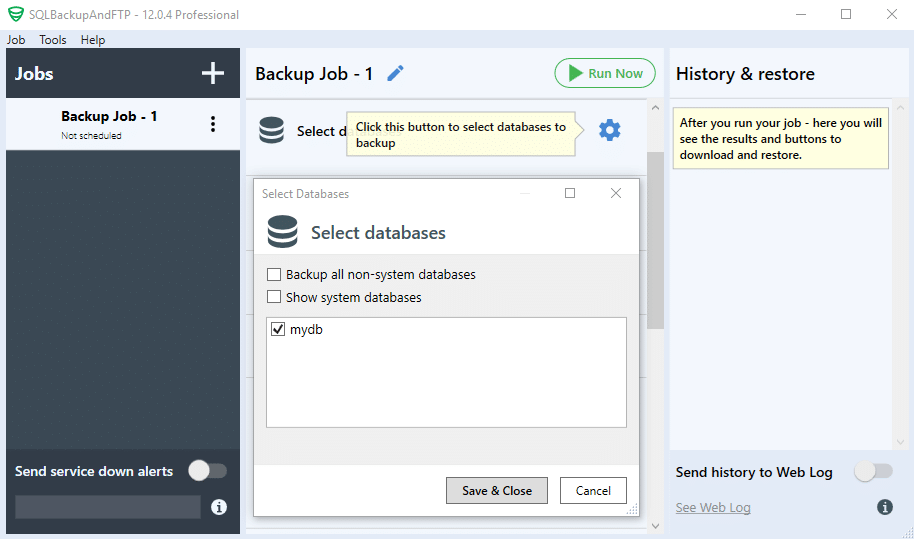
Now click the gear in the “Select database” section. Then, in the dialog box, select the databases on your MySQL server you want to backup. Optionally, you can backup all non-system databases by checking the corresponding checkbox.
3. Choose a place to store the backups
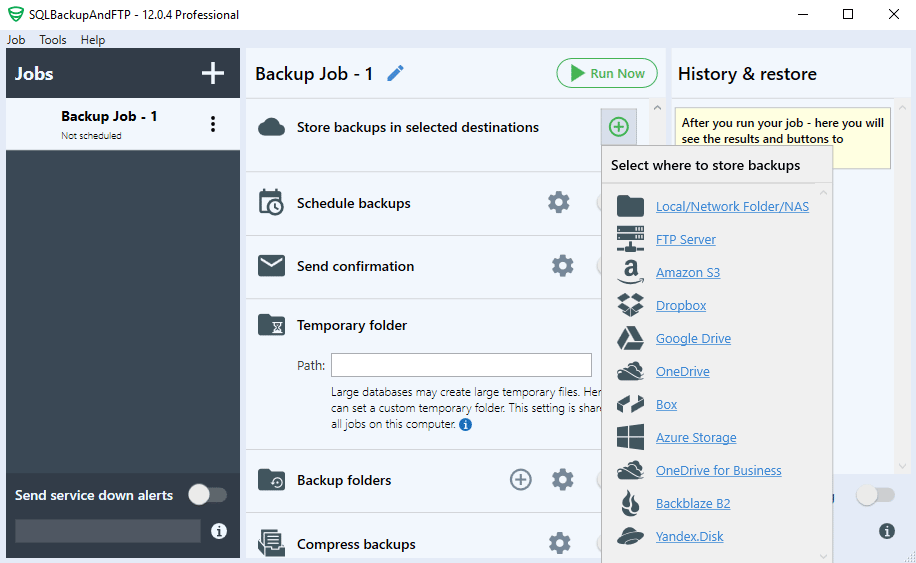
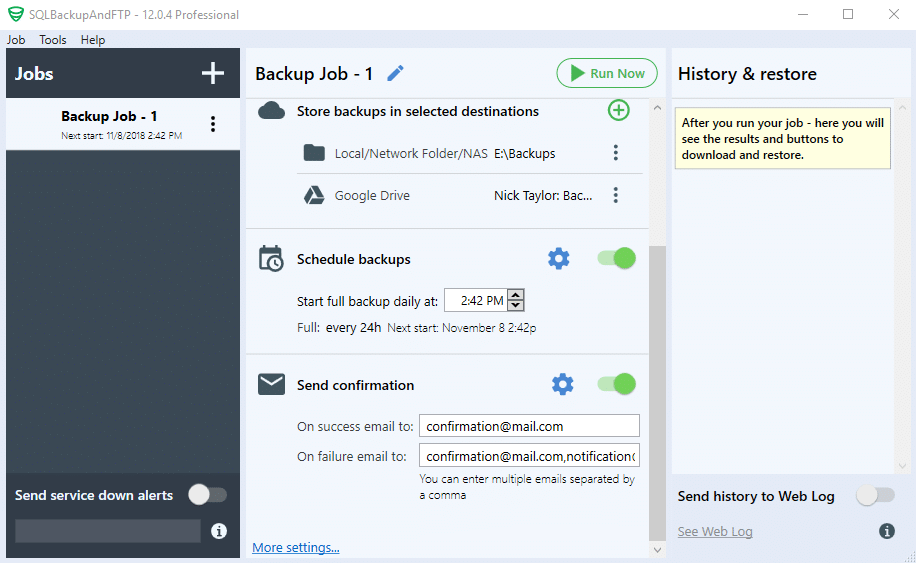
Now it’s time to choose a location where the backups will be stored. Click the “plus” button in the “Store backups in selected destinations” section, and select a destination location. Here, you can specify multiple destinations.
4. Set up a backup schedule
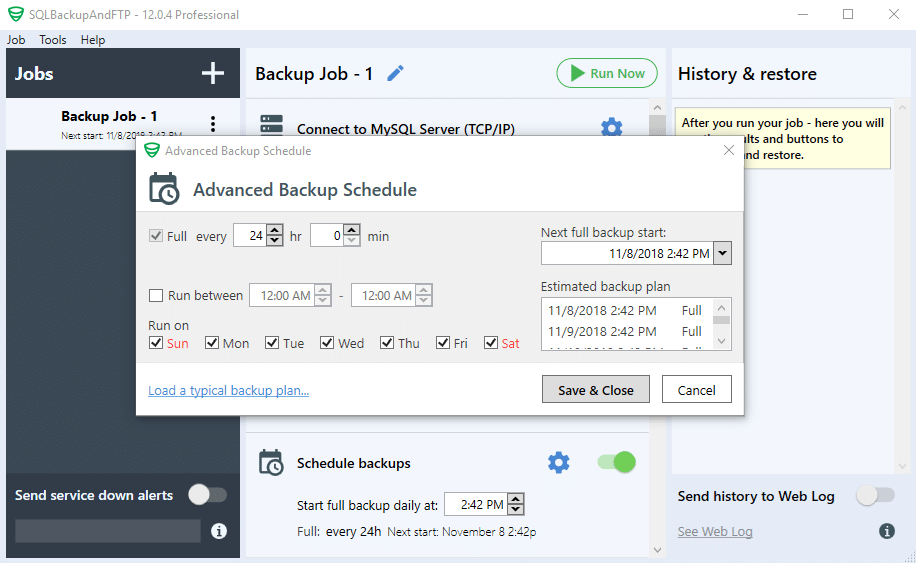
If you want to create MySQL backups regularly according to a schedule, you can turn that option on in the “Schedule backups” section. By default, it will be set to back up your database once a day (each 24 hours), but you can change the schedule by clicking the gear icon next to the green switch.
5. Set up email confirmation
If you schedule automatic database backups, you probably want to know if something has gone wrong and the backup is not created. To receive email notifications on backup failure (or success), you need to specify your email address in the “Send confirmation” section. Multiple comma-separated email addresses can be specified.
6. Run the backup job
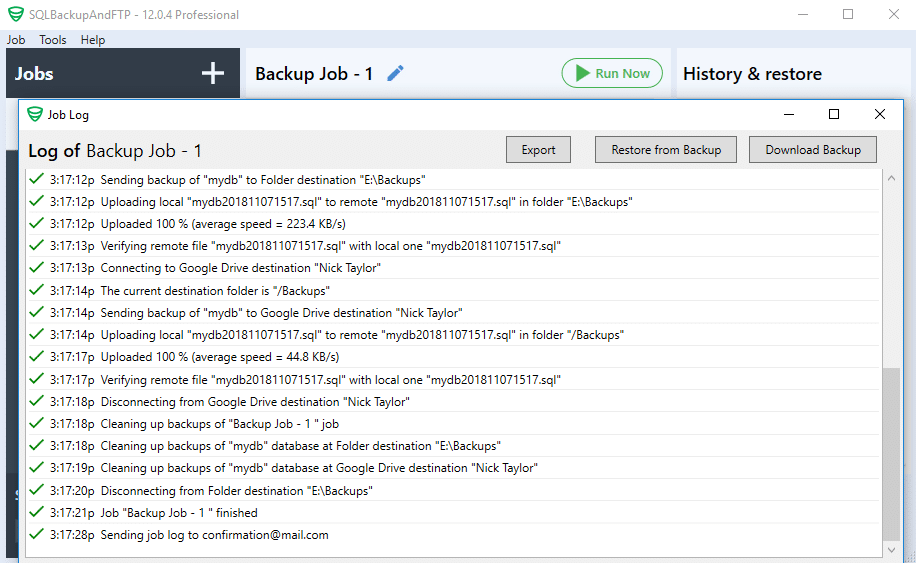
After you finish setting up, you can run the backup job right away by clicking the “Run Now” button. You will see the detailed job log as the job is executed.
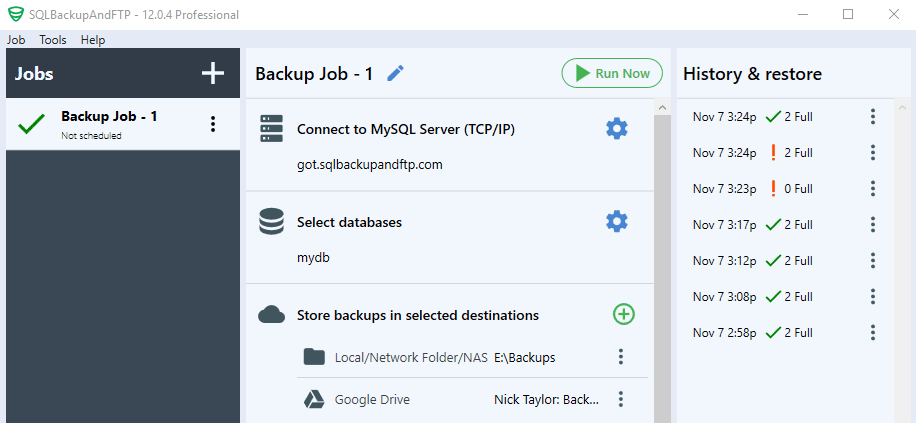
All job logs are saved in the “History & restore” pane on the right side of the screen. There you can see when MySQL backups were run and whether they were successful. By clicking the three-dot icon, you can see the detailed log of the corresponding backup job execution, and restore your MySQL database to the selected backup version.

One thought on “How to backup MySQL with SQLBackupAndFTP”
Thank you so much to provide me these tips. I tried to make a database for update my website content purpose.