 Starting from SQLBackupAndFTP version 12.2, you can backup and restore PostgreSQL along with SQL Server and MySQL databases. SQLBackupAndFTP backups PostgreSQL databases using the standard pg_dump tool and, currently, it allows you to create full database backups only.
All you need is to create a backup job as you did before, with the only difference being that you have to select PostgreSQL Server as a server type when establishing the connection. If you have just started using SQLBackupAndFTP, here is a short tutorial on how to create a backup task to backup your PostgreSQL databases.
1. Connect to PostgreSQL Server
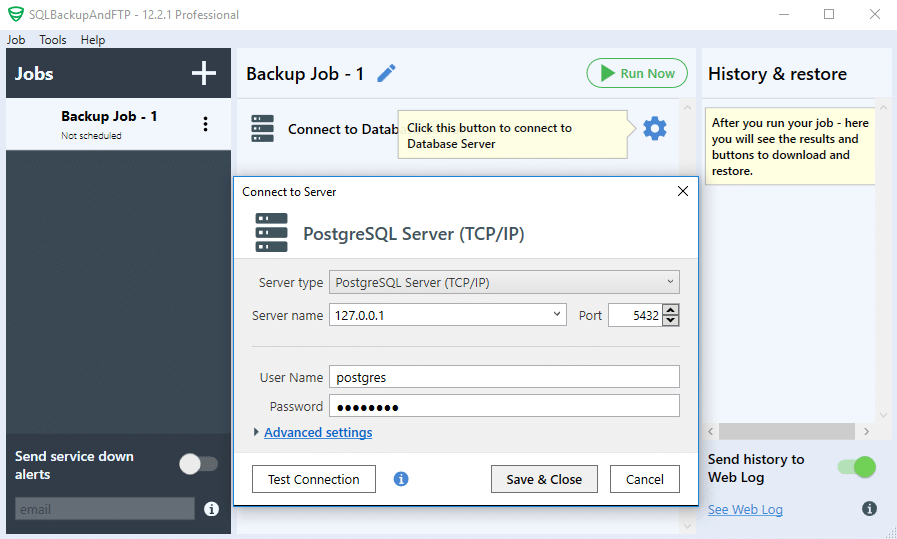
Firstly, establish a connection to your PostgreSQL Server. To do this, click on the gear icon next to “Connect to Database Server” and select PostgreSQL Server (TCP/IP) in the popup window. Then, you need to specify the server’s name, PostgreSQL User Name, and Password. To test the connection, click on the “Test Connection” button. If the connection is established, click on the “Save & Close” button to apply the settings.
2. Select databases for backup
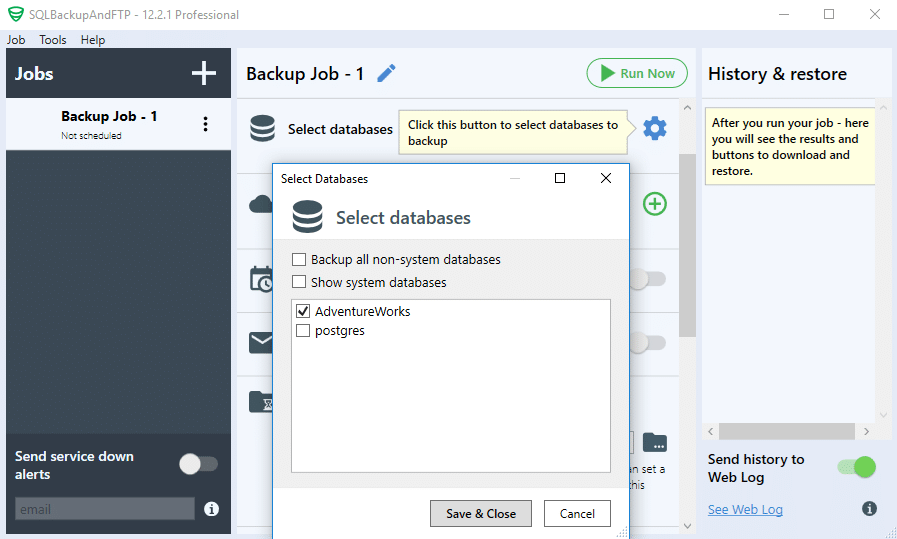
To select databases that are needed to be backed up click on the gear in the “Select database” section and check the databases required. Optionally, you can backup all non-system databases by checking the corresponding checkbox.
3. Choose a location to store the backups
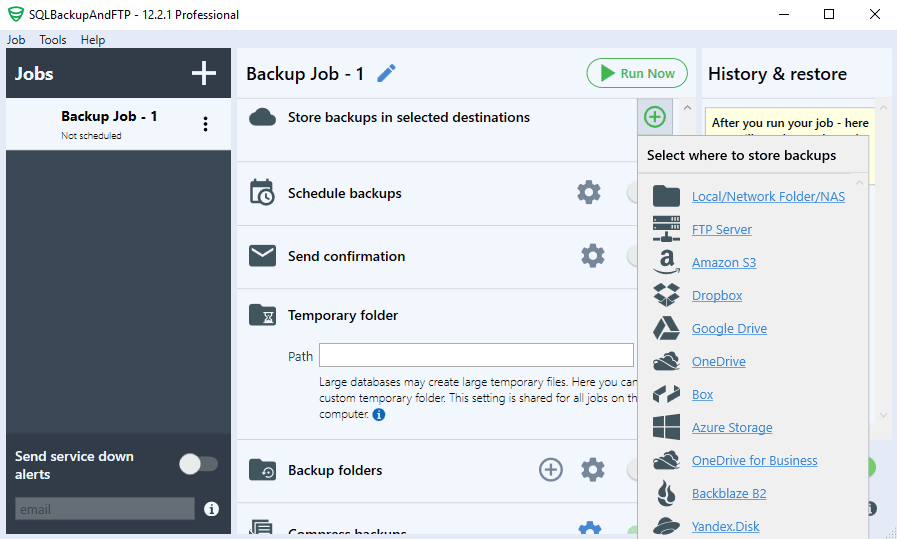
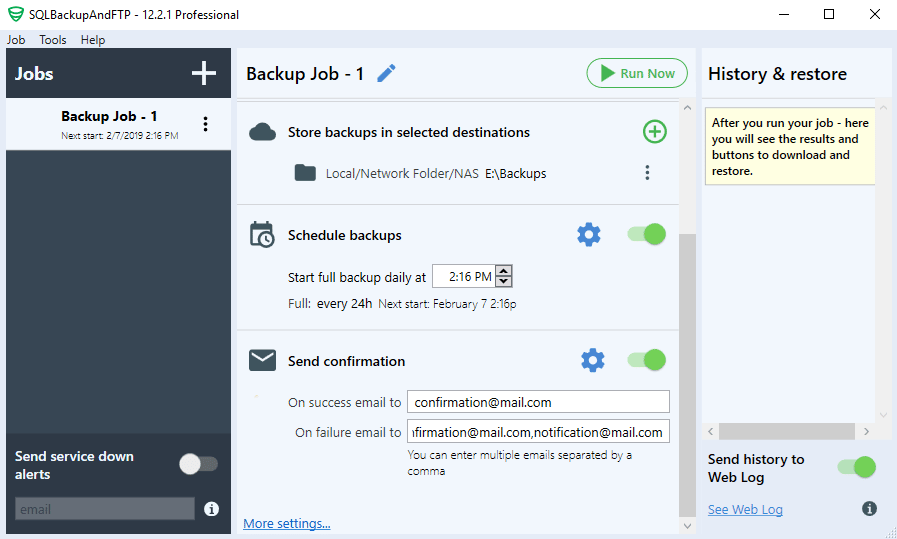
The next step is to choose a location where the backups will be stored. To do this, click on the “plus” button in the “Store backups in selected destinations” section, and select a destination location. Multiple destinations can be selected.
4. Set up a backup schedule
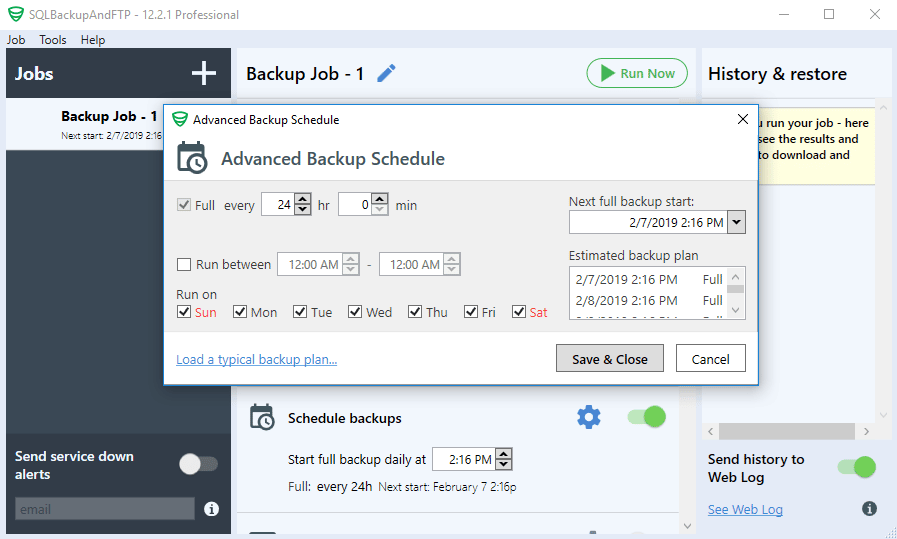
To backup your PostgreSQL databases on a regular basis according to a schedule, turn on the “Schedule backups” option. By default, SQLBackupAndFTP is set to back up your database once a day (every 24 hours). To change the settings, you need to click the gear icon next to the green switch.
5. Set up email confirmation
If your backups run according to the selected schedule, you probably want to know if they are successful or have failed. For this, use the “Send confirmation” option and specify your email address with which you would like to receive email notifications on backup success (or failure). Use comma-separated to specify multiple email addresses.
6. Run the backup job
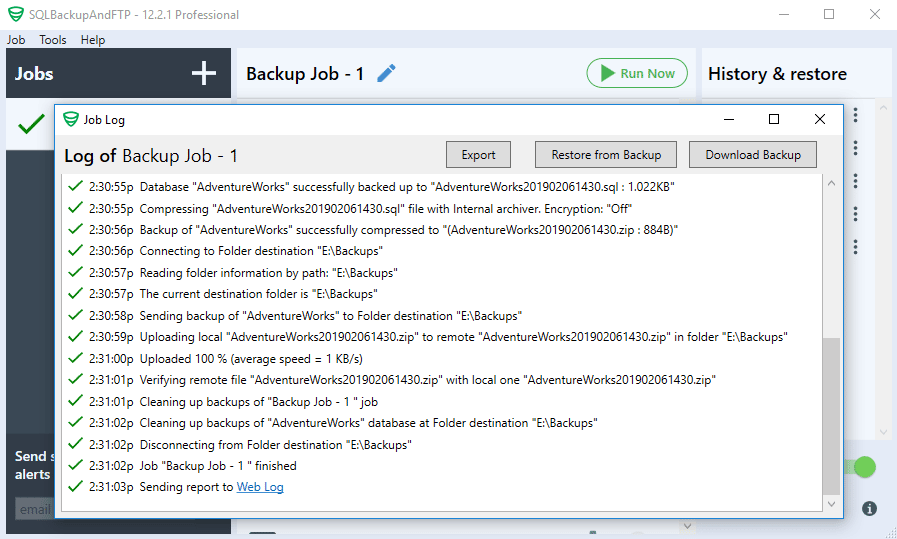
Now all the basic settings are done, you can run the backup job immediately by clicking the “Run Now” button. You will see the detailed job log as the job is executed.
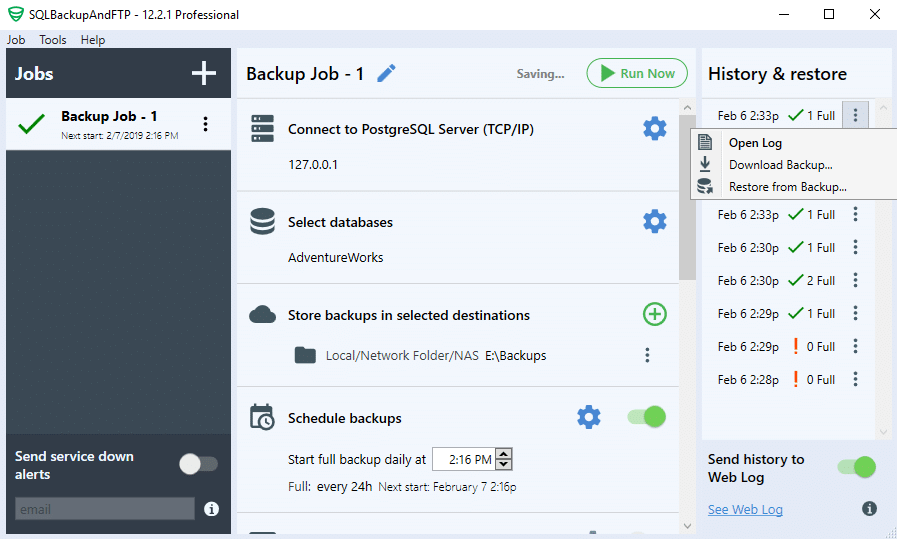
All job logs with detailed information about a backup are saved in the “History & restore” column on the right side of the application. There, you can see if your PostgreSQL backups were successful or not. Also, by clicking the three-dot icon, you can see the detailed log, download a backup or restore your PostgreSQL database.

One thought on “How to backup PostgreSQL with SQLBackupAndFTP”
Great job! We’re using the professional edition in our enterprise environment for years now. Some of our servers are running postgresql besides mssql server as well, so we are happy to hear that.