
 Due to security reasons, most admins will prefer to create accounts for any system with minimum privileges.
So now you might wonder how to create a user for Amazon S3 service that has minimum permissions in order to backup databases with SQLBackupAndFTP in a certain bucket and folder? It’s quite easy…
Due to security reasons, most admins will prefer to create accounts for any system with minimum privileges.
So now you might wonder how to create a user for Amazon S3 service that has minimum permissions in order to backup databases with SQLBackupAndFTP in a certain bucket and folder? It’s quite easy…
Set Amazon S3 access policy to minimum permission
As we said, it’s quite easy to do this. You just have to connect to your AWS Console and create a group. After that, specify a policy for the group and add a user to the group. Below are the detailed steps you have to make:
-
Log into AWS Console
In order to log into your AWS Console just go to the following link https://console.aws.amazon.com/console/home and log in with your e-mail and password.
If you do not have a user just select “I am a new user” which will take you through all the steps of creating a new user.
After logging in, you will see the navigation bar which will have a few menu items on it, at the top of your page. Looking at the right side, click your name and then go to the menu called “Security Credentials.”
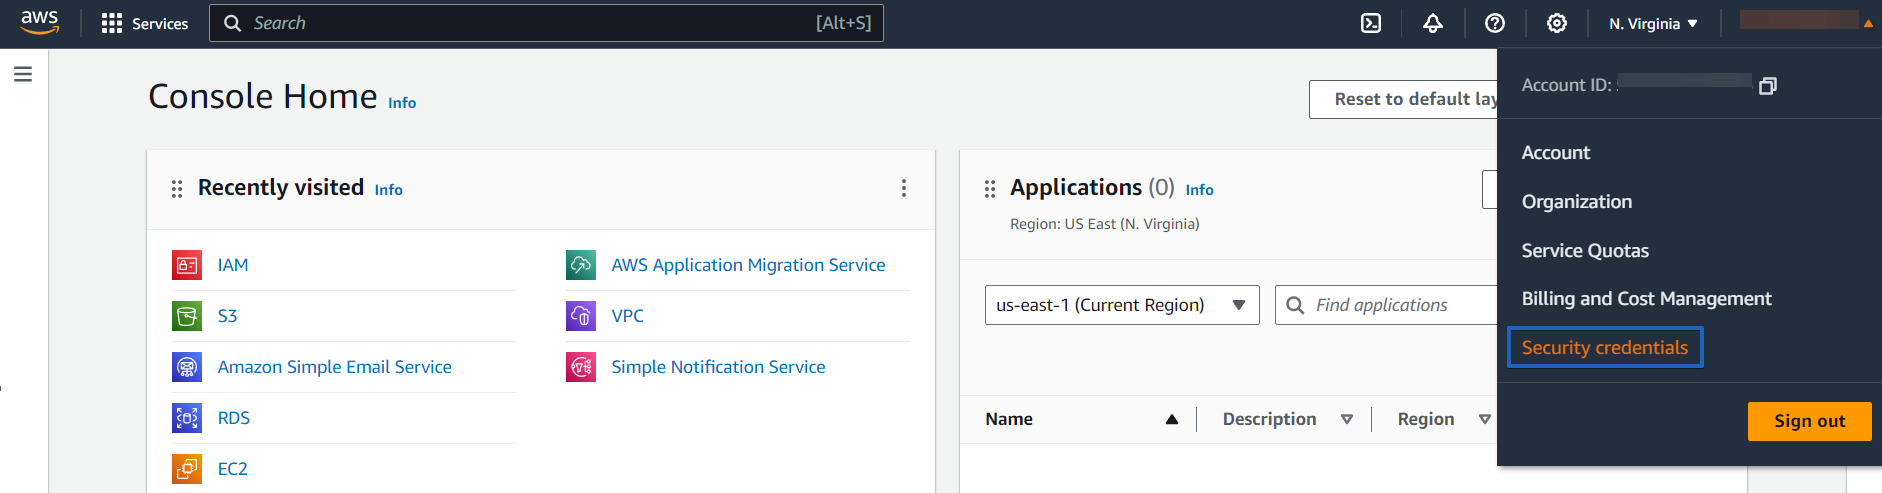
You might get a pop-up message saying that “You are accessing the configuration page for your root account credentials.” Click “Get Started with IAM Users” in order to set up your security credentials.
On the other side of the page, on the left side, you will see a few items: “Groups,” “Users,” “Roles,” and “Password Policy.” Let’s start by creating a group with a security policy.
-
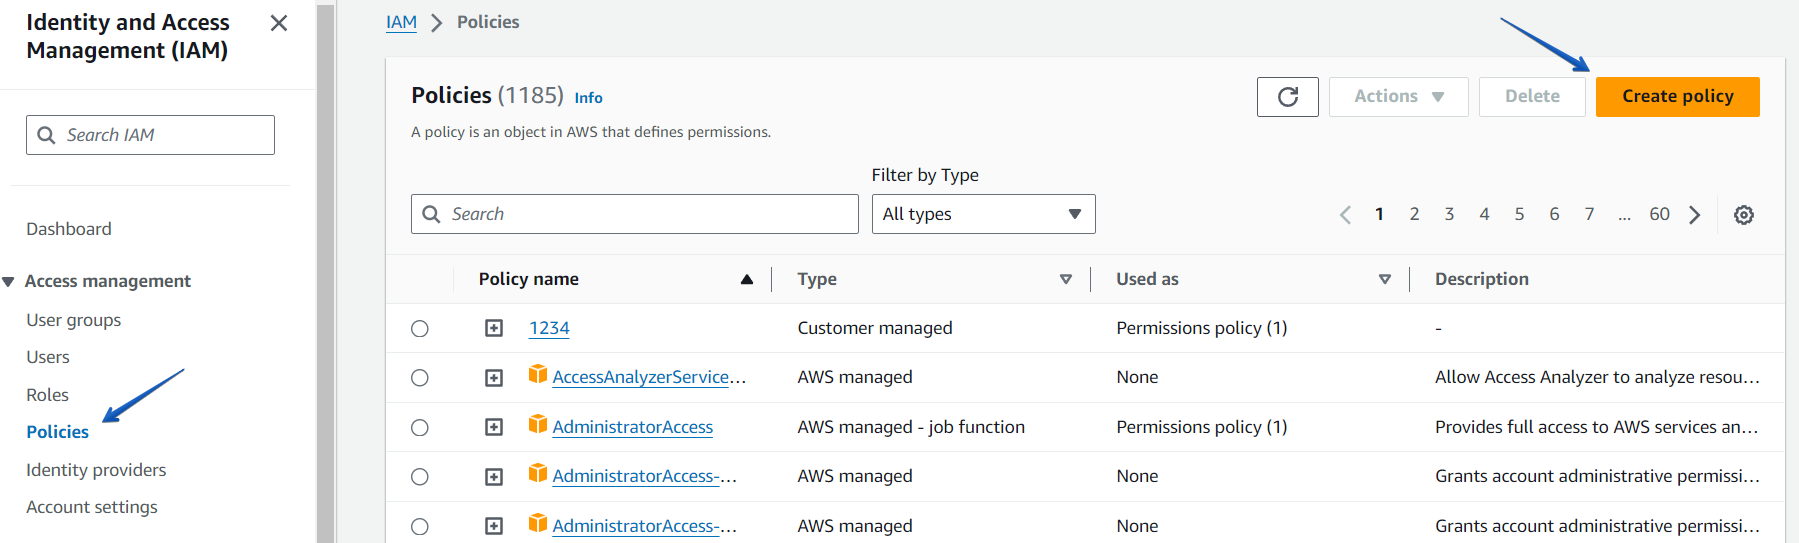
Create a security policy
To create a policy, click on the “Policies” at the left pan and create a new policy by clicking the “Create policy” button.
At this point, we can enter a policy name and manually specify its characteristics. You can find a good user guide here. But, we’re aiming for a specific situation, so we can use this policy document:
{
  "Version": "2012-10-17",
  "Statement": [
  {
    "Sid": "VisualEditor1",
    "Effect": "Allow",
    "Action": [
      "s3:PutObject",
      "s3:GetObject",
      "s3:GetObjectVersion",
      "s3:DeleteObject",
      "s3:AbortMultipartUpload",
      "s3:ListBucketMultipartUploads",
      "s3:ListMultipartUploadParts",
      "s3:ListBucket",
      "s3:GetBucketVersioning",
      "s3:GetBucketLocation"
    ],
    "Resource": [
      "arn:aws:s3:::test-s3-bucket-for-policy/*",
      "arn:aws:s3:::test-s3-bucket-for-policy"
    ]
  },
  {
    "Sid": "VisualEditor2",
    "Effect": "Allow",
    "Action": [
      "s3:ListAllMyBuckets",
      "s3:ListBucket"
    ],
     "Resource": "*"
   }
 ]
}
Copy the policy above and paste it into the appropriate section, then click on the “Next” button.
Please note that in the policy, we have specified a bucket to which access will be provided as test-s3-bucket-for-policy. You can either change your bucket name in the policy or simply use ‘*’ instead of your bucket name.
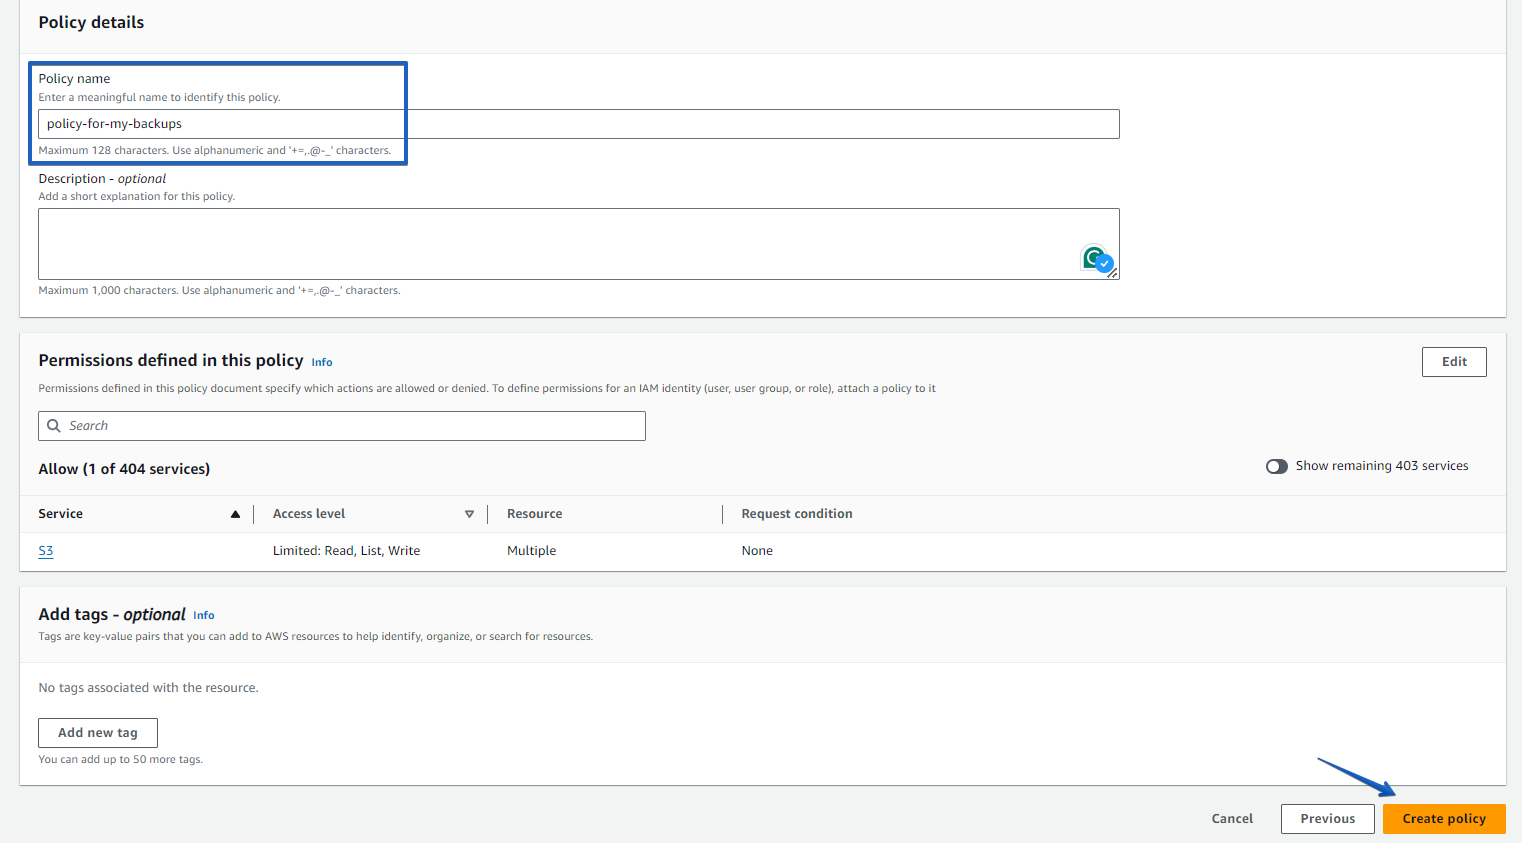
Specify your policy name and click on the “Create policy” button at the bottom of the page.
-
Create a User
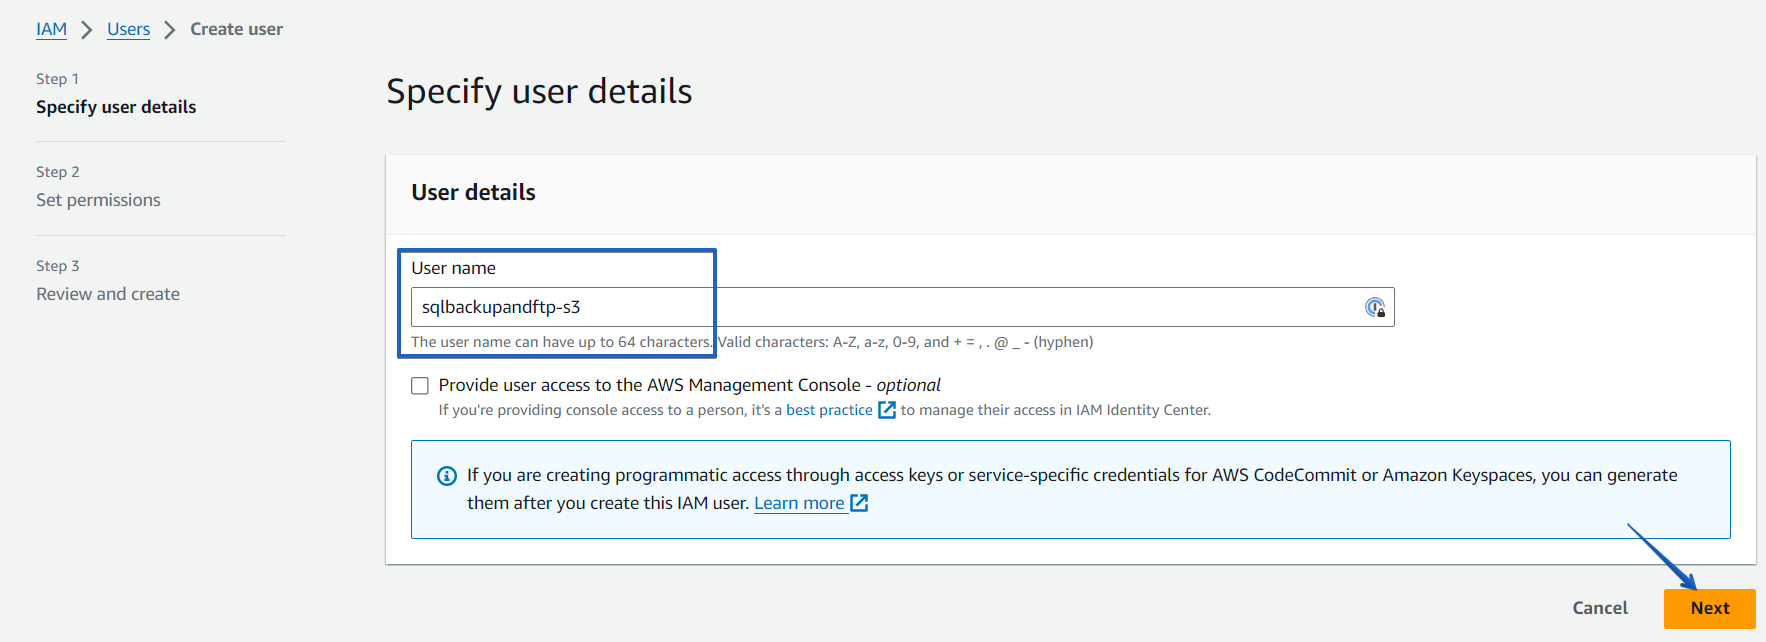
In order to create a new user, select “Users” which you can find on the left side of the AWS Console, and then choose “Create Users.”

A new window will open with 3 simple steps to create a user.Step1. Enter the username. Let’s assume it’s sqlbackupandftp-s3.
Step2. Click on the “Attach policies directly” tab and choose the policy that was created earlier.
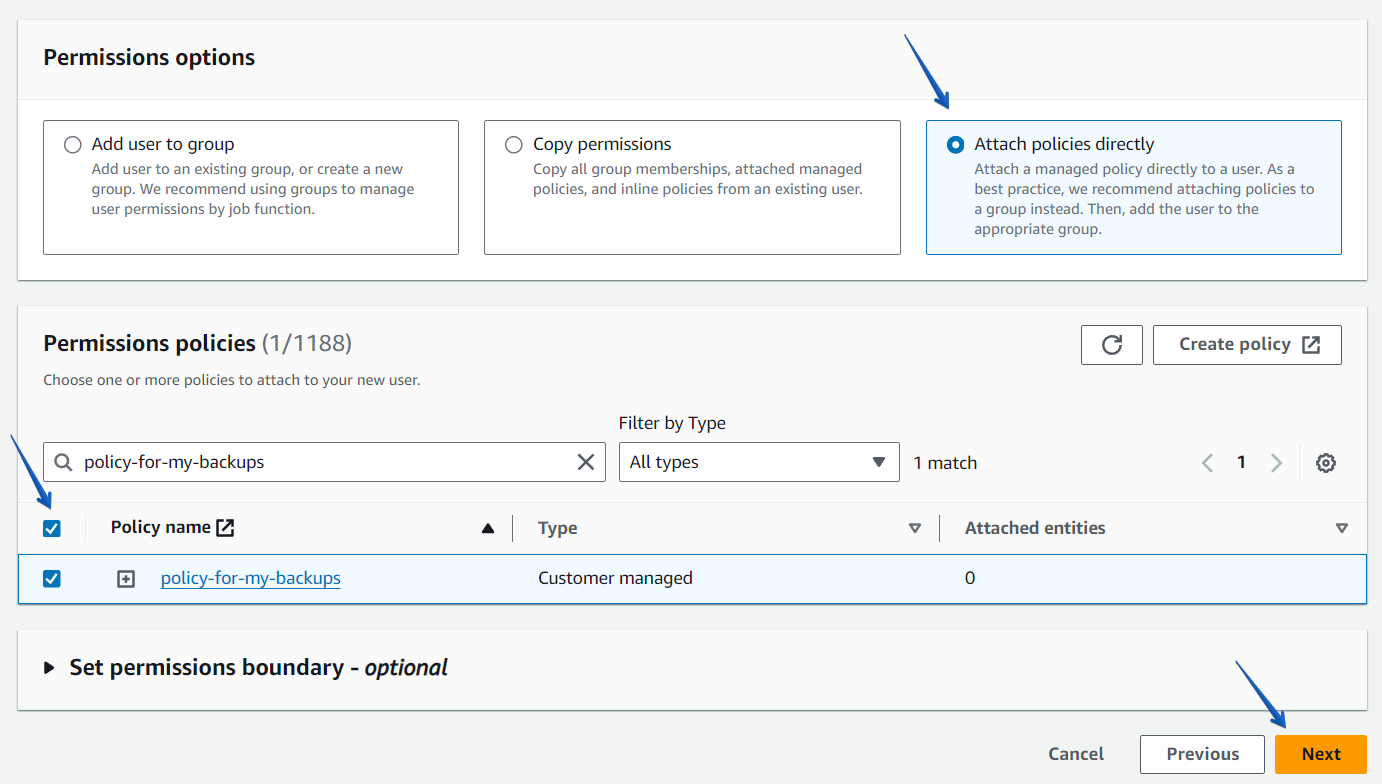 Step3. Add tags (optional) and complete the user creation.
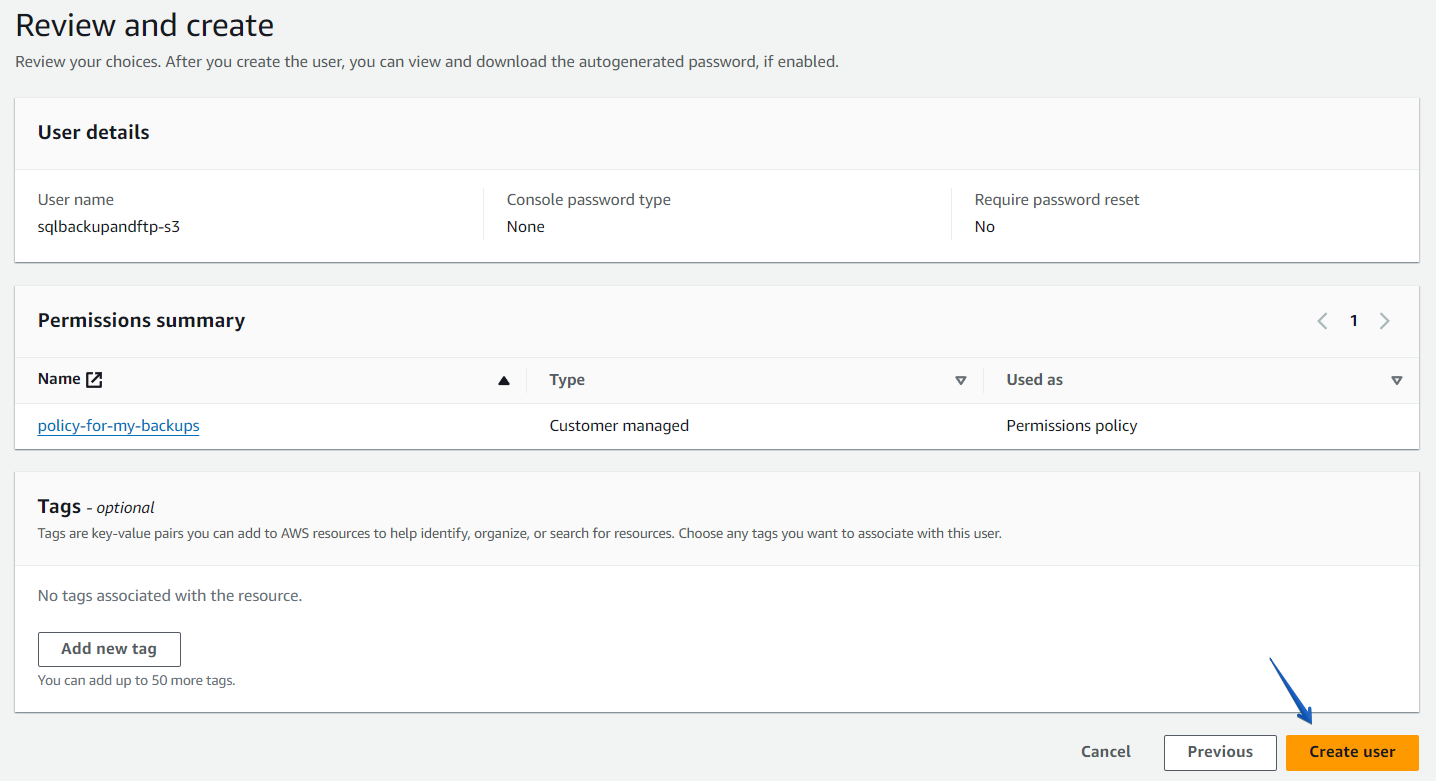
The policy is successfully set to the user. Now you can use an Accesskey ID and a secret access key to connect SQLBackupAndFTP to your Amazon S3. -
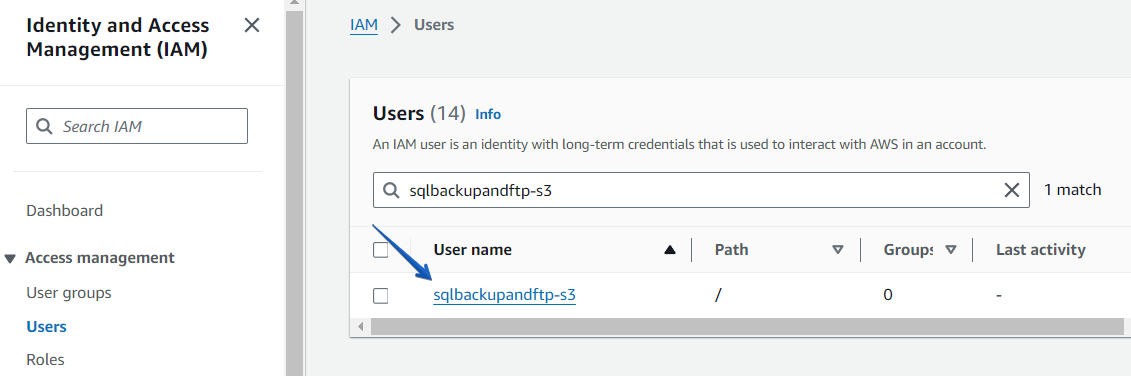
Create access key
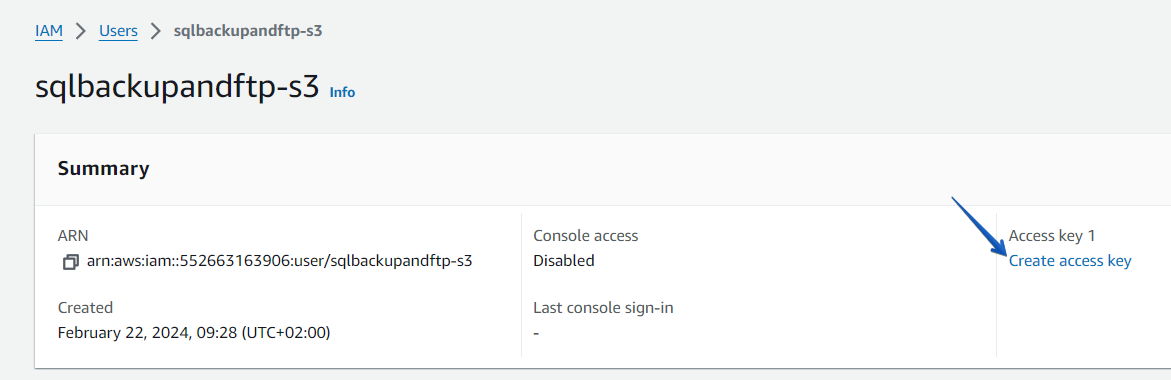
On the Users page, find the user that has been created.
At the opened page click on the “Create access key” link.
Choose “Other” from the “Use Case” list and click on the “Next” button.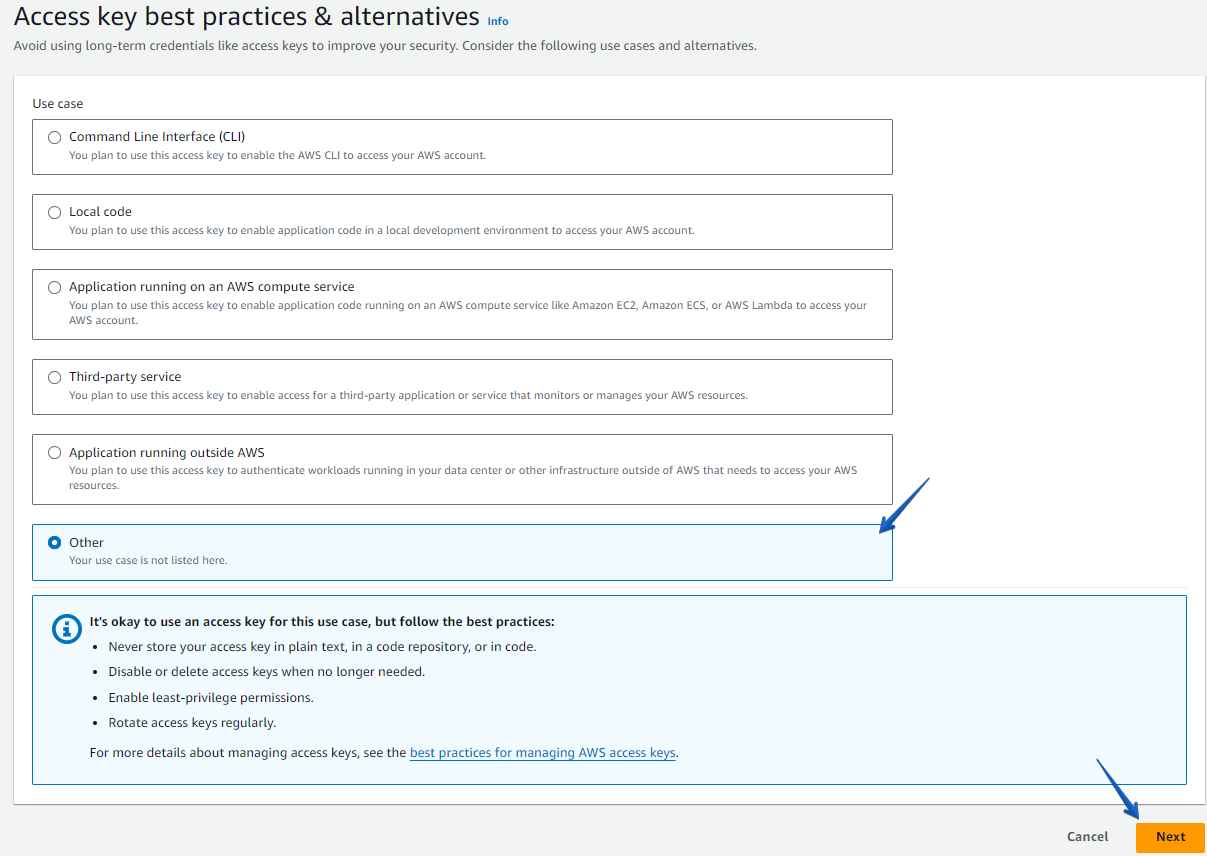
If necessary, add a description tag value and click on the “Create access key” button.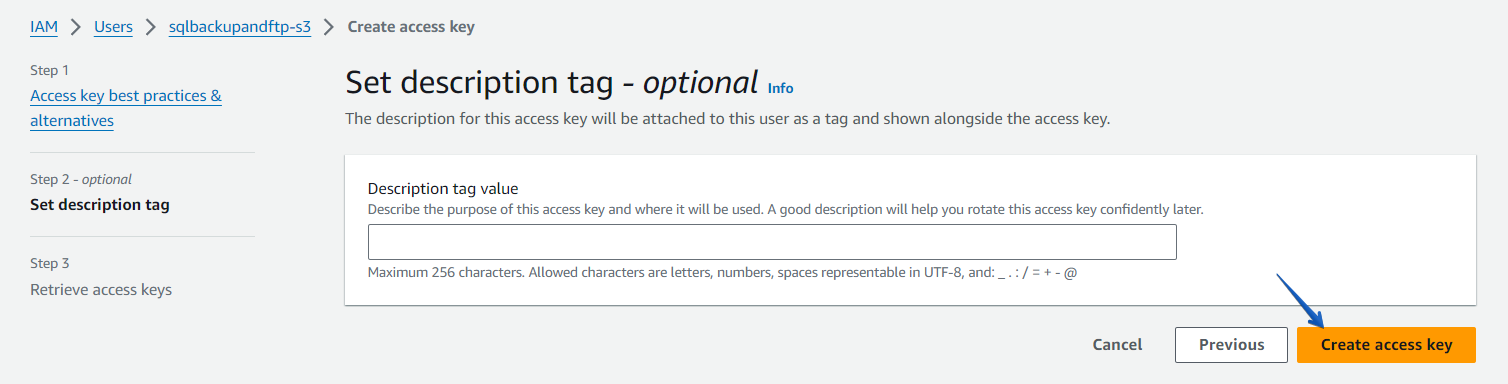
That’s it, the access key and secret access key are created. Click on the “Done” button to complete the settings.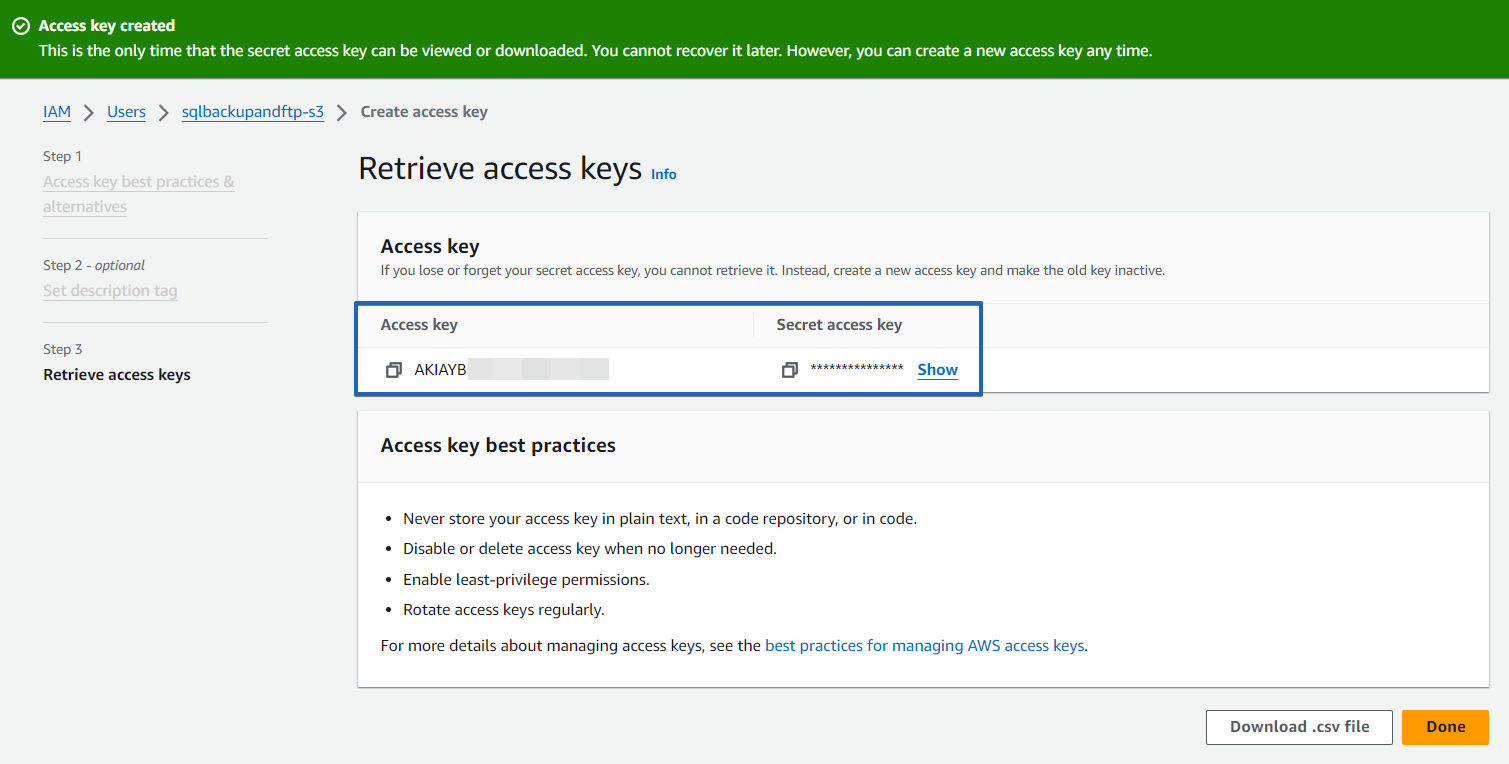
Backup to Amazon S3 with SQLBackupAndFTP
The process of backing up your database to the Amazon S3 service is going to be more detailed.
The process of backing up a database to Amazon S3 is allowed both in the Professional edition of SQLBackupAndFTP and also in the Professional Lifetime edition. The Free version of SQLBackupAndFTP will allow you to use this feature only during the trial mode.
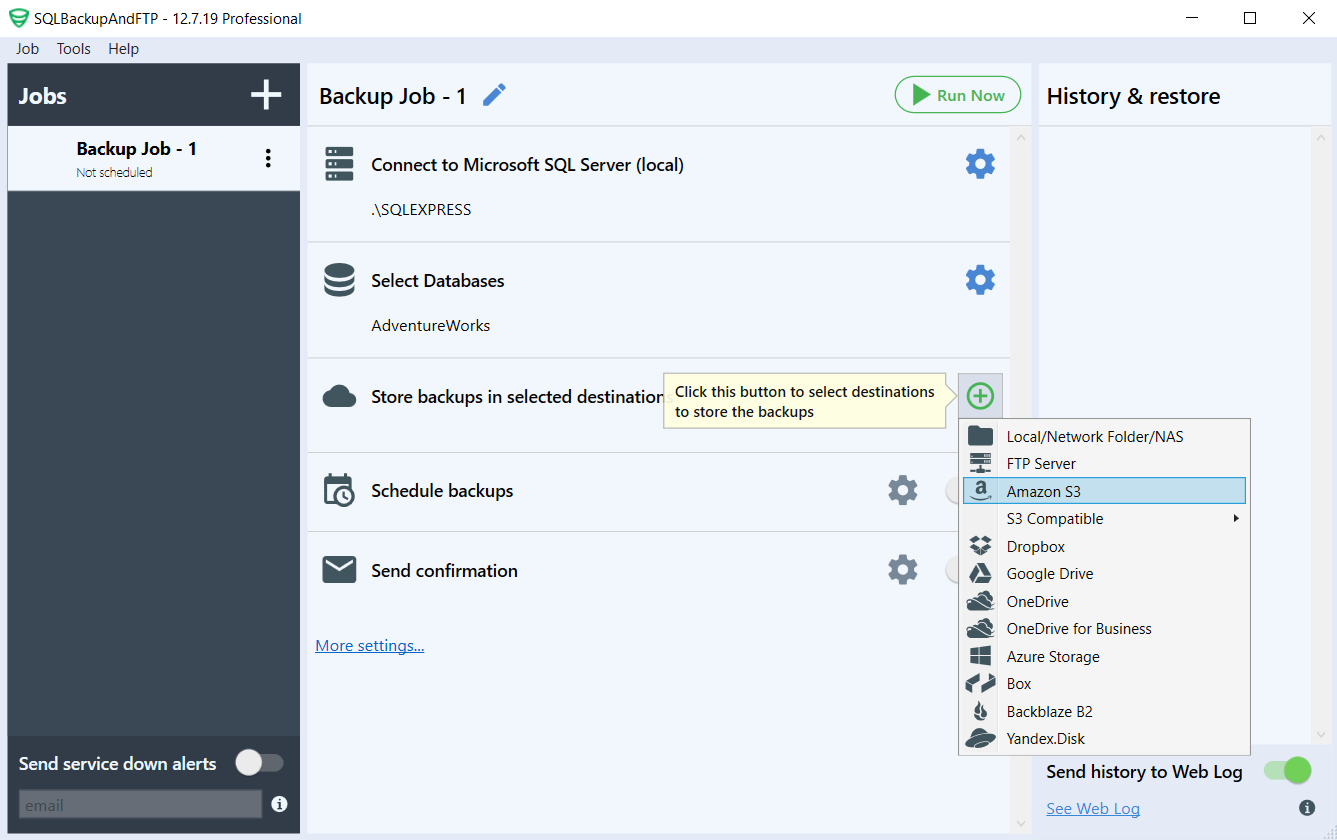
In order to select the database that you want to backup, click the “plus” button in the “Store backups in selected destinations” section and choose the option corresponding to Amazon S3 in the popup window.
After this step, you will have to enter your Access Key and your Secret Key, which you already have since you saved them after creating the backup user for your Amazon S3 service. Also, add the name of the bucket and the path where your backups will be stored on Amazon’s S3 service (instead of test-s3-bucket-for-policy, please make sure to specify YOUR bucket).
Please remember to enter the correct path for where the backups will be placed, the one that you have allowed to be used for backups using AWS Console.
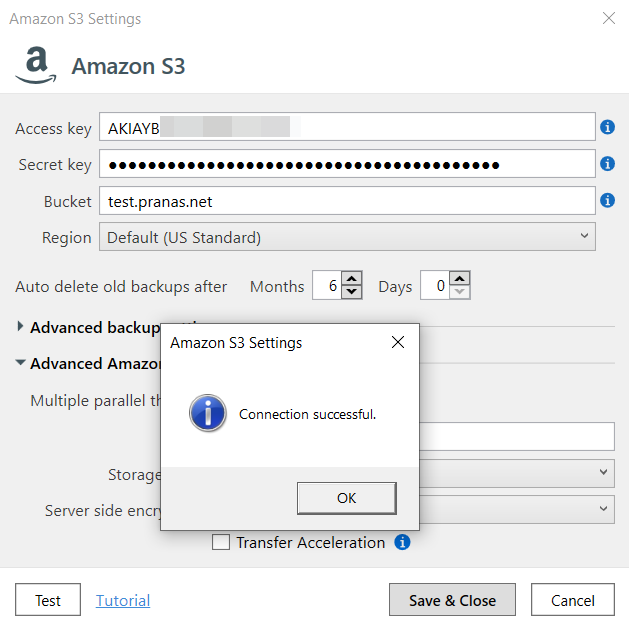
After all, this has been set up, continue by clicking the “Save & Close” button and now we will have a job that can be used to backup your databases to your backup destination on Amazon S3. You can at this point run the job by pressing the “Run Now” button.
This will trigger a popup window that will display the events that occur during the job, the progress of the job and the success or failure of execution.
One thought on “Set Amazon S3 access policy to minimum permission”
I use Linux with Firefox Browser.
I am getting an annoying pop up telling me to log or sign into my Amazon S3 back up. How do I remove this?
Please help