You can perform SQL Server database backups in many ways, for example, you can make backups with the help of T-SQL Commands or SSMS. Also, you can choose a destination where your SQL Server backups will be stored, let’s say, Azure Storage. But how much time does it take to create SQL Server backup and then sent it to Azure Storage? With the help of SQLBackupAndFTP, you can perform a backup and then send it for storing to Azure Storage in a few minutes.
How to backup SQL Server to Azure Storage
Follow these simple steps to create a backup job, which will make backups according to your schedule and then send them to Azure Storage automatically:
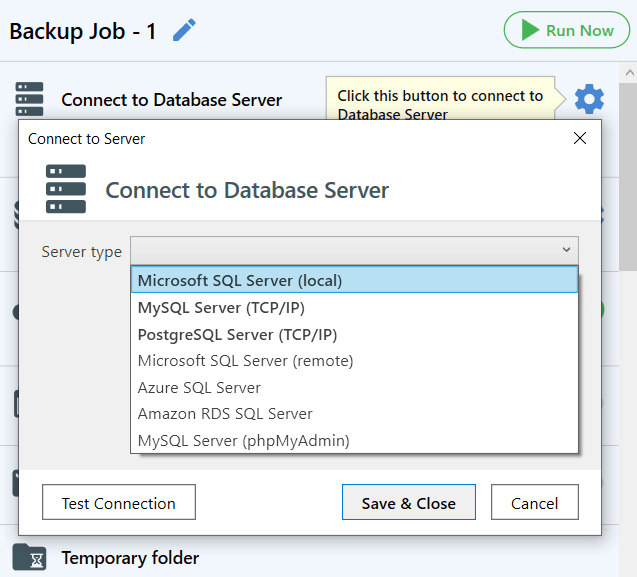
After you have downloaded and installed SQLBackupAndFTP run it and connect to your DBMS, just click on the gear button at the “Connect to Database Server” choose your DBMS, specify your server’s name and credentials.
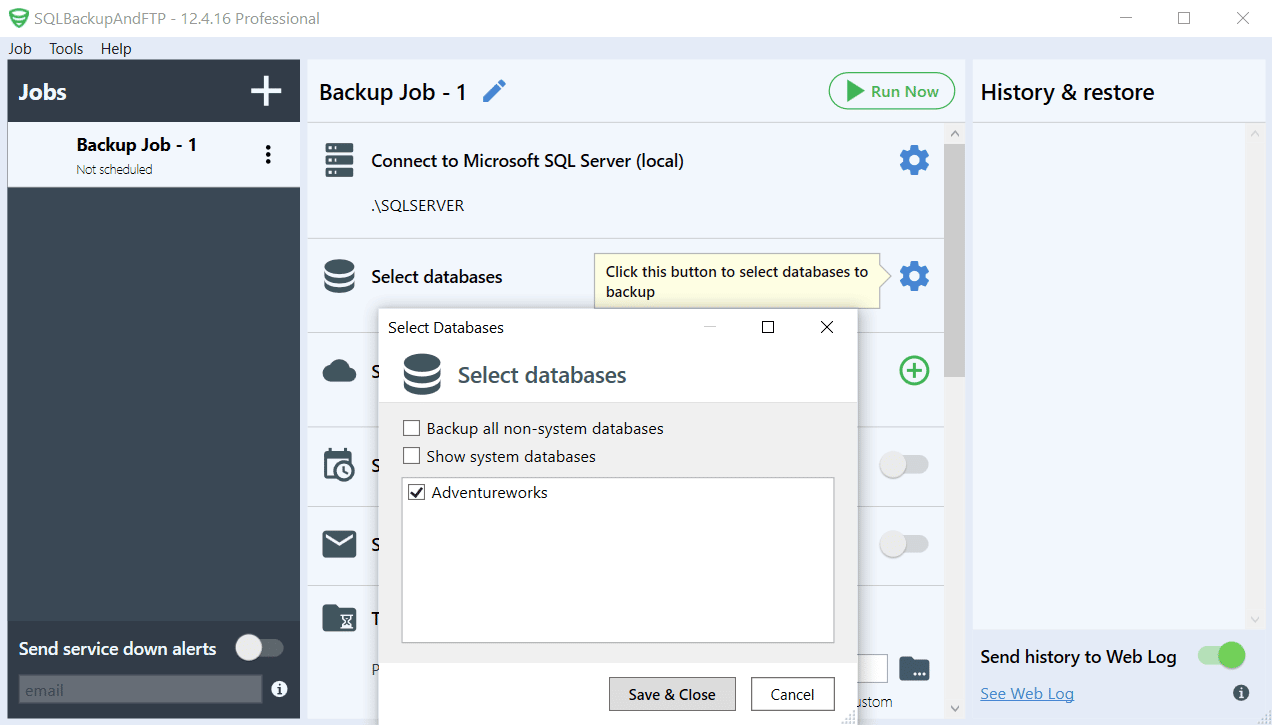
Now please select all databases which you need to backup. To do it click the gear button in the “Select database” section.
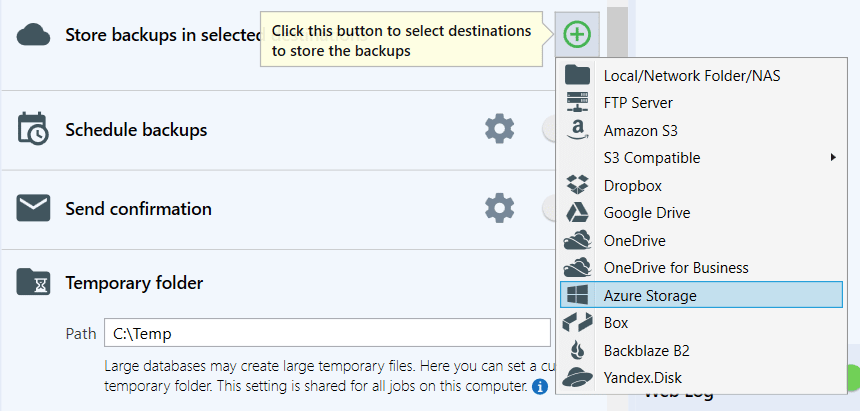
Go to the “Store backups in selected destinations” and select “Azure Storage” from the list.
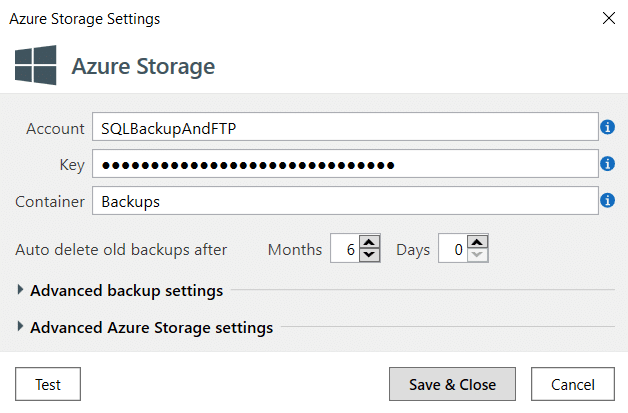
Specify your Azure Storage “Account name”, “Access Key” and “Container Name” and press “Test” to check the connection. Click “Save & Close” to apply all settings.
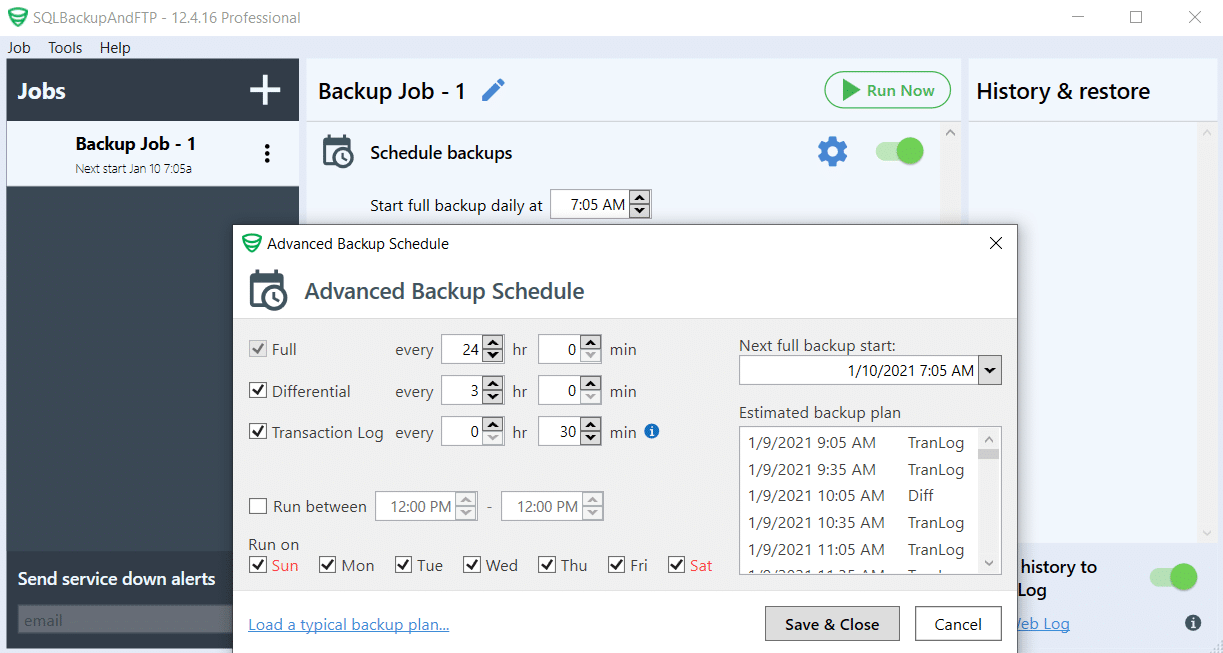
Turn on “Schedule backups” and press the gear button to set up a schedule for your backup job.
Press “Run Now” to make SQL Server backup immediately.


2 thoughts on “How to Backup SQL Server to Azure Storage”
How do I backup in Azure “File storage” not “Blob Storage” ? Right Now the backups are uploaded into Azure “Blob Storage” and I can’t find an option to select the Azure File Storage.
Hello,
Sorry, but currently there is no way to do it. Thank you for the feature request we’ve forwarded it to our dev team.
Thank you.