
Making a full database backup is very easy with mysqldump . Details are available in this article. However, such backups are a heavy load on the database because they require a lot of space and take a long time to create. This is not acceptable for a large production database. Therefore, instead of FULL database backups, you can do incremental database backups.
Incremental backups do not contain all database data but only the data that changed since the previous backup. In this case, to restore the data, you will need the entire chain of backups.
Incremental backups are smaller, faster, and have almost no load on the database.
This article will cover:
1. Ways to make an incremental MySQL backup
2. How binary logs work
3. Preparing the database for incremental backups
4. How to back up binary logs
5. Data recovery
6. Automation utilities
Two Basic Ways to Make an Incremental Backup of MySQL on Windows
1. mysqlbackup– is a utility developed by Oracle for creating physical MySQL backups. The utility can also make physical incremental backups. Its main downside is its price. The utility is included in the MySQL Enterprise Edition, which costs $5k. More details can be found in the official documentation.
2. Creating incremental backups by archiving binary log files. It will be discussed in detail below.
How Binary Logs Work
Any transaction that inserts, deletes, or updates data in MySQL also records that transaction in special files called binary logs.
To find out where the binary logs are stored, run the following:
show variables like 'log_bin_basename'
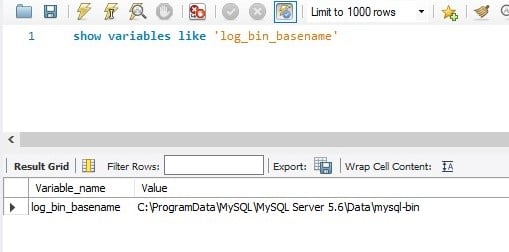
The numeric index of the file is appended to the value of the log_bin_basename variable.
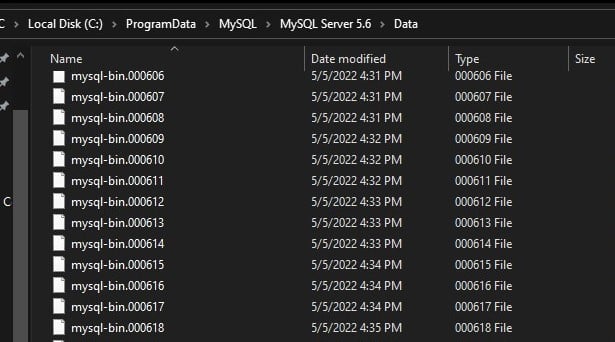
The variable log_bin_basename stores a prefix for binary log files. Transactions are recorded only to the last file. When it reaches a certain size or after a specified time, a new binary log file is created, and transactions are recorded to it. You can also force the creation of a new file by executing the flush log sql command.
The data in the binary log is recorded in binary format, but this data can be converted into SQL commands with the mysqlbinlogutility. Then, these SQL commands can be used to restore the data.
Binary logs are not only used for backups. They are also used for replication. It is through them that data is synchronized.
Preparing the Database for Incremental Backups
Data will be recorded to binary logs if the ‘log_bin’ flag is on:
show variables like 'log_bin'
If they are not enabled, you need to enable them. To do this:
-
Find the file with
my.inisettings - Make a backup copy of
my.ini, just in case - Add the following text to the end of it
[mysqld]

server_id=1
log-bin=mysql-bin
expire_logs_days = 2
binlog_format=row
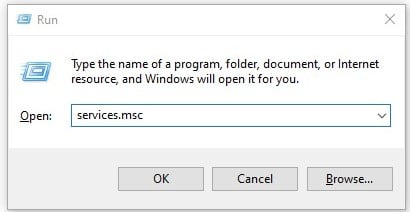
- Press win+r and run
services.msc
- Look up mysql56 (or something similar) in the list of services
- Right click — restart

How to Make an Incremental Backup
After configuring MySQL Server, you can start creating incremental backups. However, the first backup in the chain must be a FULL backup.
Full Backup with FLUSH LOGS
To make a FULL database backup, run the following command:
mysqldump -u user -p --flush-log --master-info=1 sakila > c:\backups\sakila.sql
The command will create a backup of the sakila database and record it in the sakila.sql file.
Note the following two parameters:
--flush-log – this parameter initializes the recording of a new binlog file
--master-info=1 – if this parameter is specified, the name of the binlog file created by the flush log transaction will be written to the dump file
Take Incremental Backup
Incremental backup is simply copying binlog files, but оnly new files that were not in the previous backup should be backed up. Also, you can not copy the last binlog — it will not be complete.
To avoid confusion, do the following:
- Save the list of binlogs
- Execute
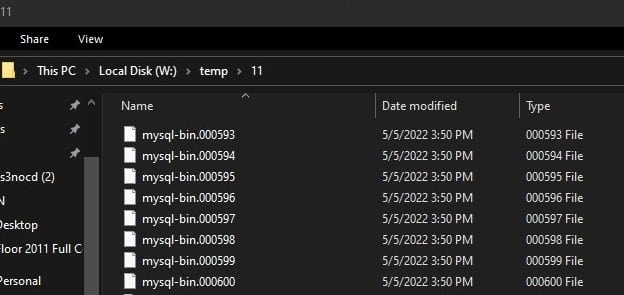
FLUSH LOG;transaction - Move all saved binlog files to a temporary directory
- Archive this directory
- Send the archive to the repository
- Delete all temporary files
Below is a batch script (.bat) that does these steps. It is convenient to compress the backup with 7z utility. You can download it here.
At the beginning of the script, you need to specify the paths to the backup storage directory. The path to 7z.exeand mysql.exe utilities and data to connect to the database.
rem path to binlogs directory
set binlog_folder="C:\ProgramData\MySQL\MySQL Server 5.6\Data\"

rem binlog file mask name, set in my.ini in the variable log-bin=mysql-bin
rem it is better to add ".0*" to the end of the mask; this ensures that extra files do not fall under the mask
set binlog_file_mask="mysql-bin.0*"

rem path to 7z.exe
set path_7z="c:\Program Files\7-Zip\7z.exe"

rem path to mysql.exe
set mysqlexe_path="C:\Program Files\MySQL\MySQL Server 5.6\bin\mysql.exe"

rem backup storage directory
set backup_folder="w:\backup\%DATE:/=% %TIME::=-%"

rem credentials to connect to MySQL
set mysql_user=root
set mysql_password=1234

rem create a temporary directory
mkdir %backup_folder%

rem save the list of binlog files available for copying
dir /b %binlog_folder%%binlog_file_mask% > binlog-files.txt

rem initialize the record in the new binlog file
%mysqlexe_path% -u %mysql_user% -p%mysql_password% -e "FLUSH LOG;"

rem move the binlog files into the backup archive
for /F %%A in (binlog-files.txt) do move %binlog_folder%%%A  %backup_folder%\%%A

rem compress the backup
%path_7z% a %backup_folder%.zip %backup_folder%\\

rem delete temporary directory
RMDIR /S /Q %backup_folder%
The first time this script will copy all existing binlogs, but later it will copy only the new ones.
Schedule
Backups should be automated without human intervention. You can schedule regular backups using the Windows Scheduler. More details on how to schedule a task via Windows Scheduler can be found here.
Restoration
1. The first step in restoration is to create an empty database.
CREATE DATABASE sakila;
2. Then restore data from a full backup to the new database.
mysql.exe -u root -pmy_pass sakila < sakila.sql
3. After that, you can restore data from incremental backups. Unzip files from archives with incremental backups and put them into one directory.
4. Open the file of the full backup; in the beginning, there will be a string like this:
-- CHANGE MASTER TO MASTER_LOG_FILE='mysql-bin.000596', MASTER_LOG_POS=120;
You need to restore the binlog files starting from the one specified in the MASTER_LOG_FILEparameter.
5. Use mysqlbinlogto extract SQL commands from the binlog files. Note that the order of the files does matter. Proceed from a smaller index to a larger one.
mysqlbinlog.exe --database=sakila mysql-bin.000596 mysql-bin.000597 mysql-bin.000599 mysql-bin.000598 mysql-bin.000600 > sakila-binlog.sql
6. Upload the resulting .sql file to the database.
mysql.exe -u root -pmy_pass sakila < sakila-binlog.sql
Yay, the data was successfully restored!
Potential Issues
The solution described above has a few potential pitfalls. First, data schema changes (such as adding columns or tables) are stored at the DBMS level, not at the DB level. If you want to restore a specific database, you must ensure no schema changes have occurred. Additionally, the MySQL incremental backup method described above is prone to human error. If you mix up some steps, e.g., if you feed the wrong files for the mysqlbinlog utility, there will be no errors, but the data in the restored database will be incorrect.
SqlBak
Instead of creating backups manually, you can use a third-party utility, such as SqlBak. The main function of this utility is to backup your database and upload it to the cloud. The application can create full and incremental MySQL backups, automatically delete obsolete backups, notify you if something goes wrong and allow you to restore data in one click.
SqlBak is focused on managing backups across multiple servers from the cloud.
Bellow, you can find a short tutorial on how to set SqlBak to back up your MySQL Server databases:
- Once the SqlBak app is installed please connect your server to SqlBak.
- Now set a connection to your DBMS. To do it please run the SqlBak app, press the “+Add” button, and specify your server’s name and your credentials. Once the connection is established, you can close the app and all further settings will be made on your “Dashboard” page.
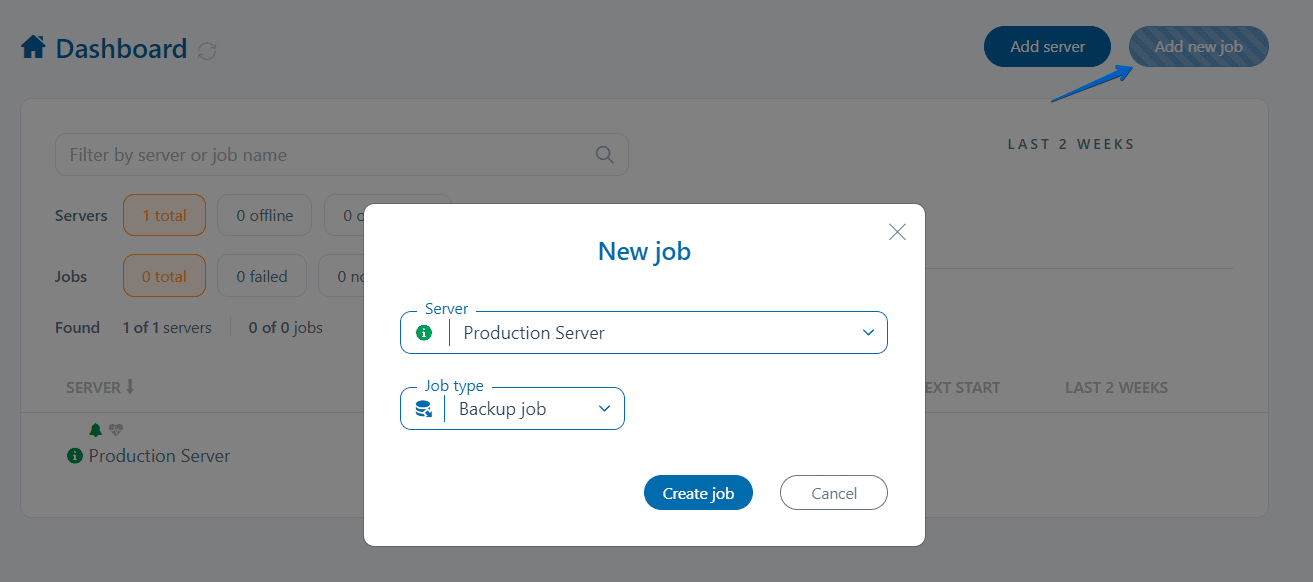
- Once the connection is set, go to your “Dashboard” page and click on the “Add new job” button to create a new job.
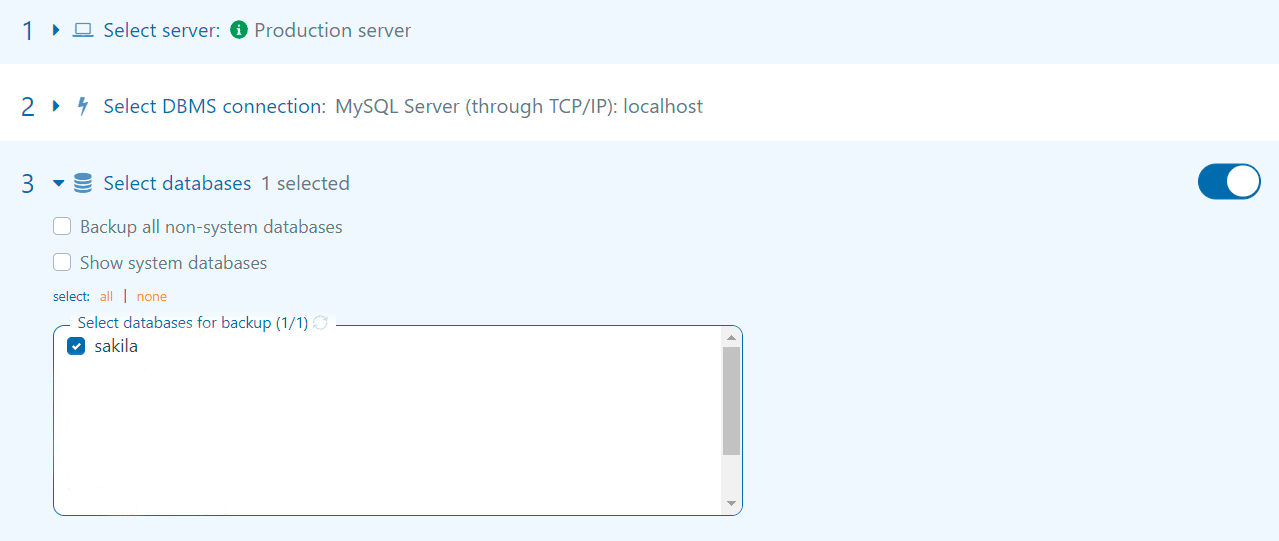
- On the opened page, choose the databases you prefer to backup:
- Now choose a place where the backups will be sent. Note you can set several destinations.

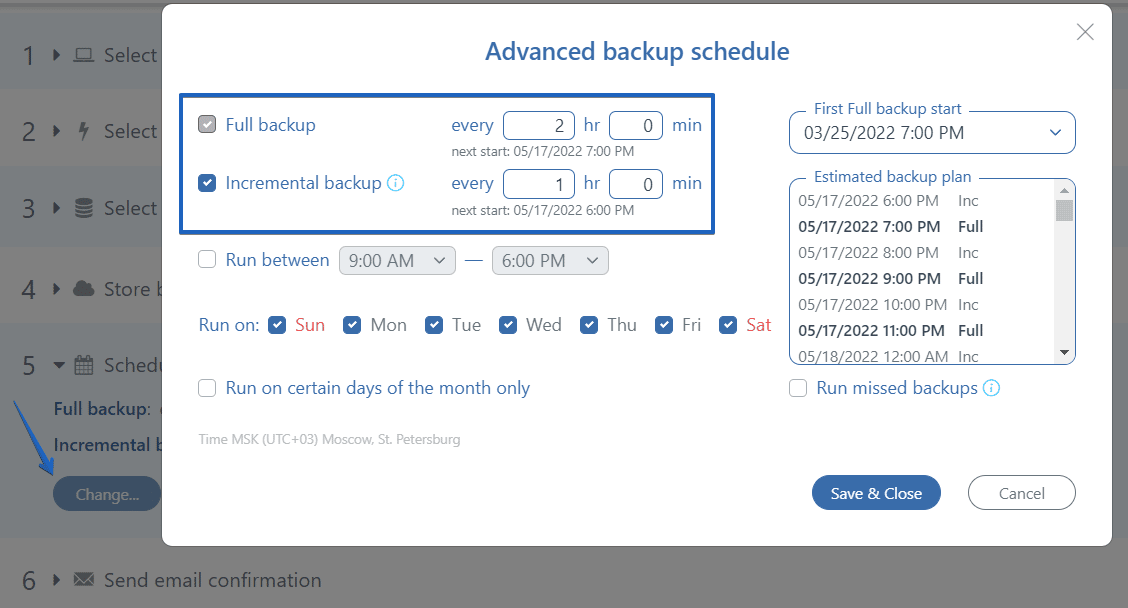
- The last of the minimum required settings is a backup job schedule setting. Just turn it on and go to the advanced settings to set full and incremental backup schedule settings.
That’s it. All the minimum settings have been made. In your backup job settings, you can find email notification, encryption, compression, restore, and other options. Once the settings are made, please save the job and it will be run according to the schedule you set.
SQLBackupAndFTP
Another utility that can automate incremental backups of MySQL databases is SQLBackupAndFTP. Unlike SqlBak, this utility is installed on the server where the database is hosted. SQLBackupAndFTP allows you to create a backup of the job and set what to backup, where, and how. SQLBackupAndFTP supports sending backups to FTP, SFTP, FTPS, NAS, local or network folder, Google Drive, Dropbox, OneDrive, Box, Amazon S3 (and any S3-Compatible storage), Azure Storage, Backblaze B2, and Yandex.Disk.
A backup job can be created in a few minutes, just follow these steps:
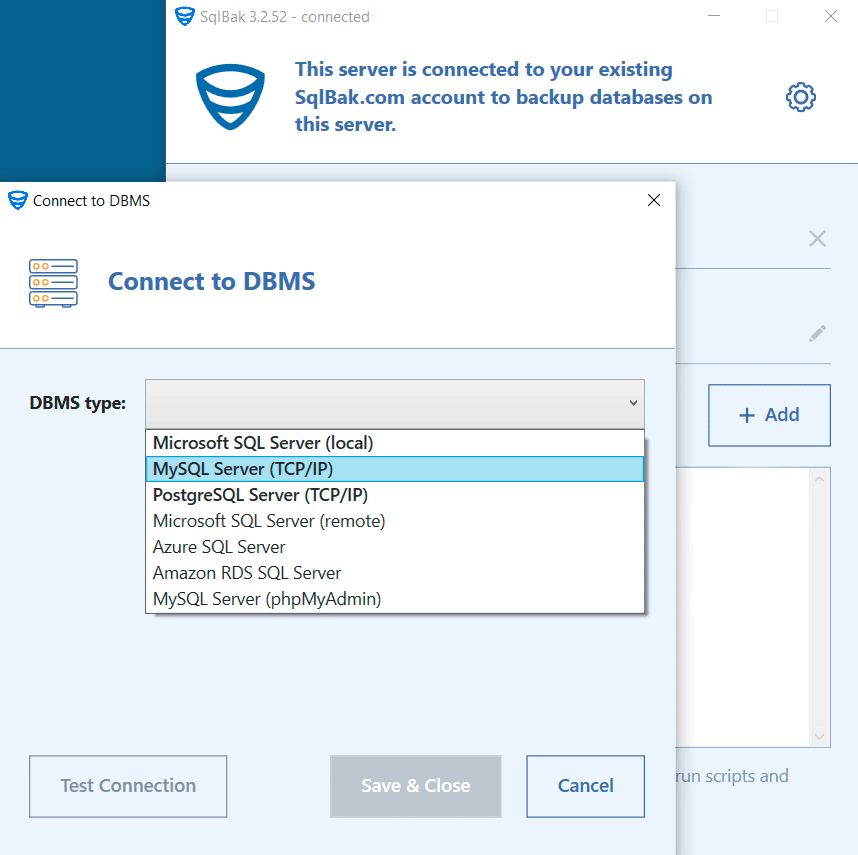
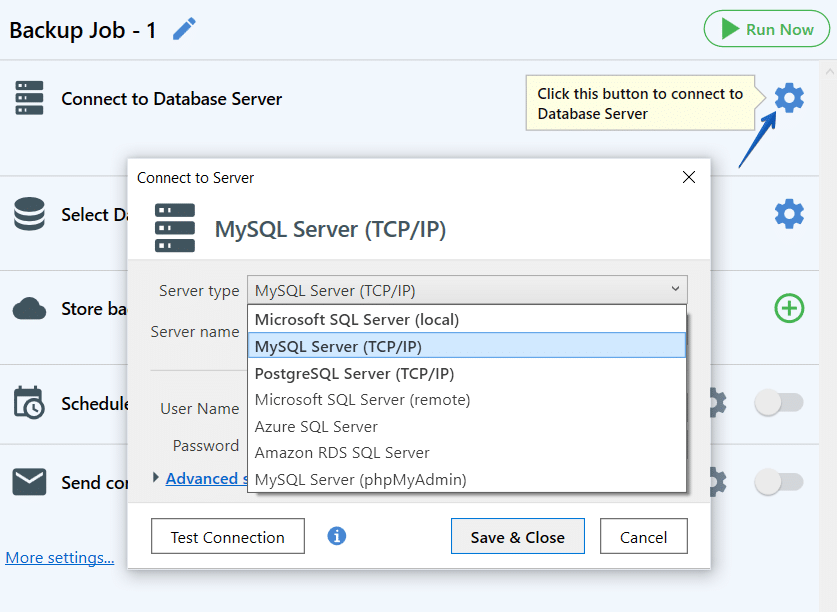
- Set a connection. Click the gear icon at the “Connect to Database Server” section and choose MySQL Server (TCP/IP) as your server type. In the opened window specify your Server’s name and the credentials to connect.
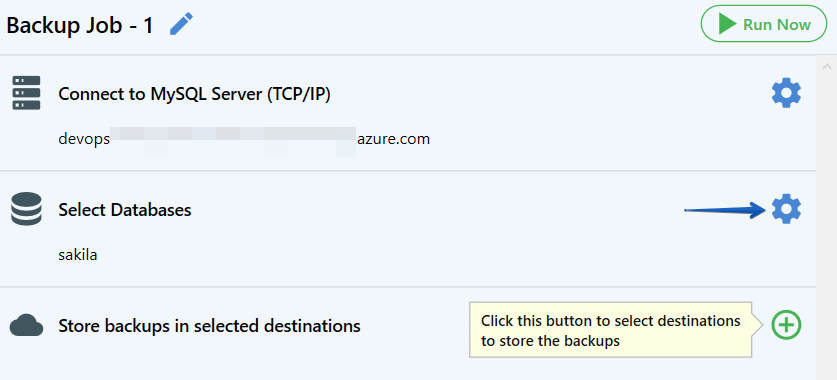
- Now you can choose the databases that should be backed up in the “Select Databases” section.
- After that select destinations where the backups will be sent. You can set multiply destinations.

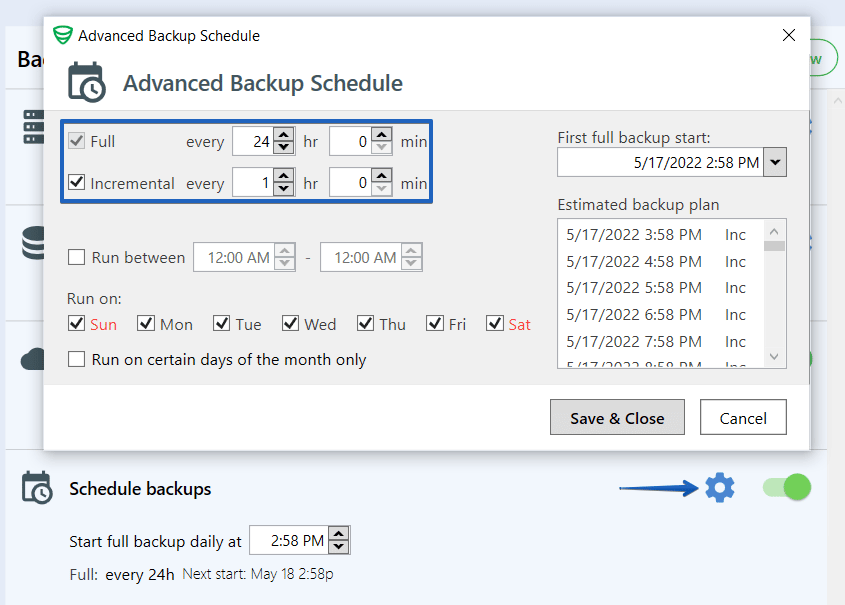
- And the last of the minimum required settings is the schedule setting. Turn on the “Schedule backups” option and press the “gear” button to find the advanced settings where you can disable or enable the incremental backups. Add the settings you need and save them.
That was the minimum set of settings to run your backups according to the schedule. Also, you can set email notifications, compression and encryption settings, restore and do maintenance on jobs, etc.
Bottom line
Incremental backups for MySQL offer many advantages: they are faster, take up very little space and do not overload the database server at all. It means that you can do them much more often and actually ensure point-in-time recovery.
Their biggest downside is that they are more challenging to create and more difficult to restore. However, you can avoid this by using SQLBackupAndFTP or SqlBak.
No matter how you do your backups, remember the most important thing — you need a backup to recover your data. Test your backups from time to time. Dedicate an hour from your weekly schedule to ensure your data is protected.
4 thoughts on “MySQL Incremental Backups on Windows”
I love your product. Keep up the good work.
Hello,
Thank you for the warm words!
How many servers can be supported by one license? Would like to purchase the license
Hi Edward,
By default, one license can be used to activate the app on one computer, but during purchase, you can specify the number of computers where the license will be used. If you buy a license for at least 2 computers, a 15% discount will automatically be applied at checkout (or 20 computers in the case of the “Professional 1 database” edition). For more details, please contact us directly support@sqlbackupandftp.com
Thank you!