
SQLBackupAndFTP is a versatile tool specifically developed for database backup and restoration. It enables users to create backups and restore them within the same DBMS. It also offers the capability to back up Azure SQL databases and restore them in SQL Server, and vice versa. To help you migrate data from Azure SQL to SQL Server, we have prepared a comprehensive step-by-step guide on configuring backup and restore jobs.
Backup Job Configuration
- Create a backup job.
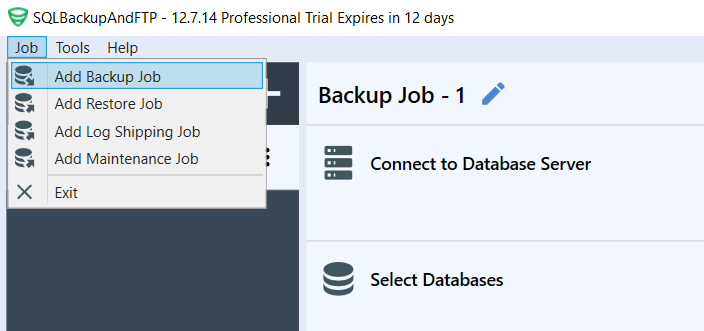
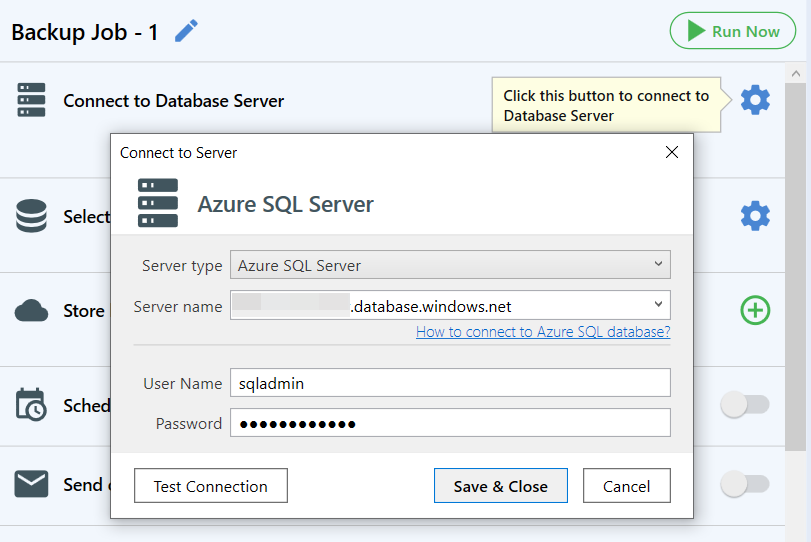
SQLBackupAndFTP – Create a Backup Job - To configure the connection for creating backups in your desired DBMS, please follow these steps. Regardless of whether you are creating a backup for Azure SQL or a local/remote SQL Server, select the “Azure SQL Server” connection type. In the “Server Name” field, enter your server name and provide the appropriate username and password credentials.
Connecting to Azure SQL databases - After configuring the connection, select the databases you wish to migrate from Azure SQL Server to SQL Server. Additionally, specify the desired storage destination for the backups, set a schedule for the job, configure email notifications and make any other necessary adjustments to the settings.
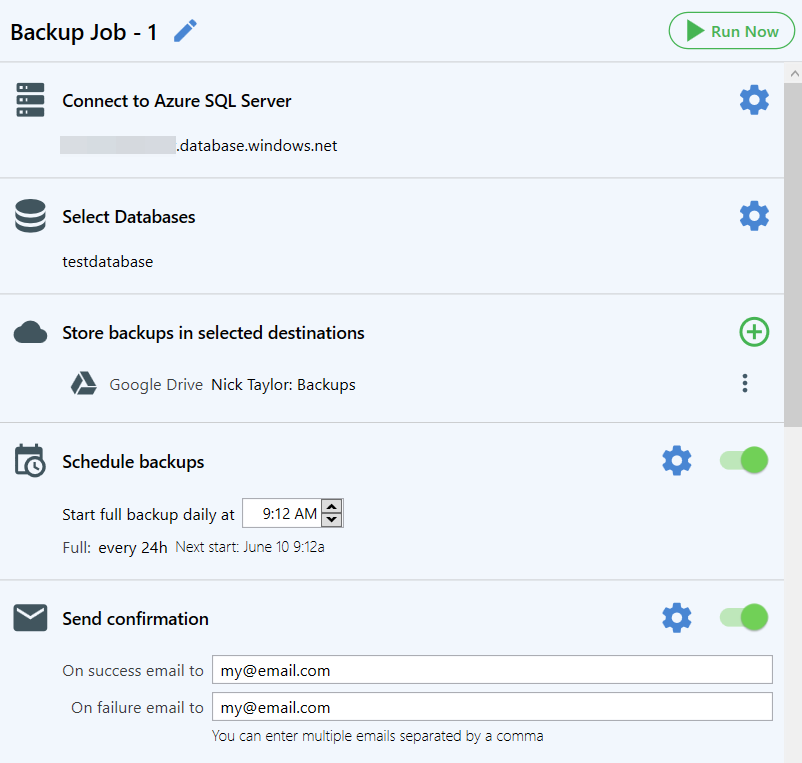
SQLBackupAndFTP backup job settings
Restore Job Configuration
- Create a restore job.
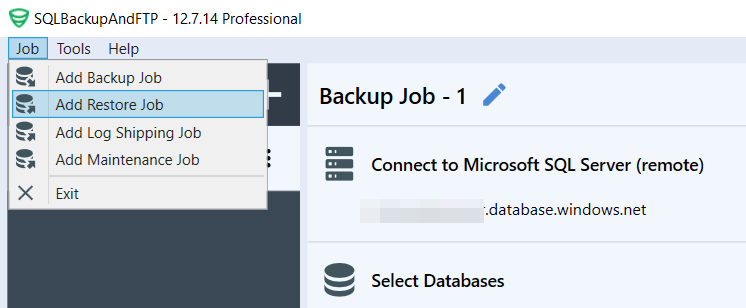
SQLBackupAndFTP – Create a Restore Job - To establish a connection to the storage location of the backups, please follow these steps.
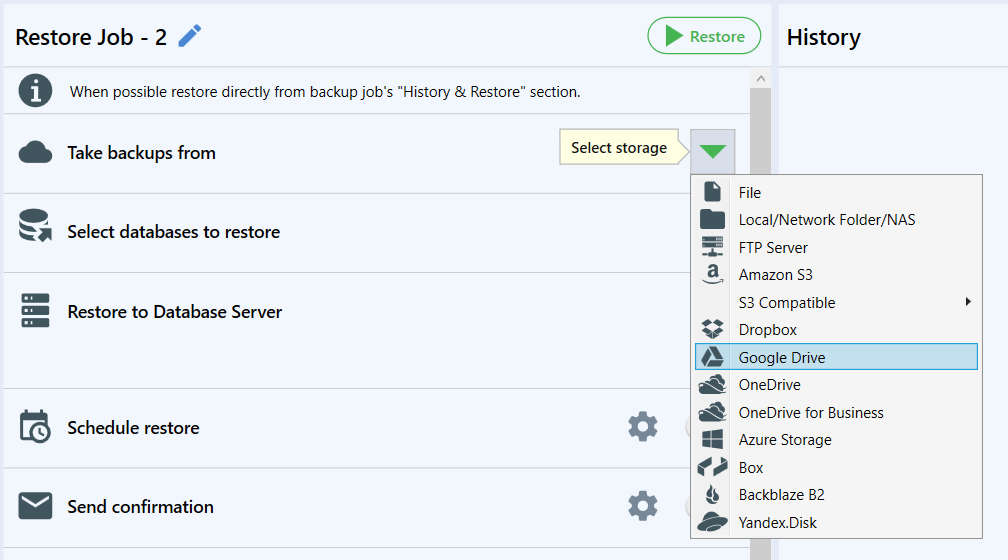
Select the destination from which you need to restore the backups - To proceed with the restoration process, select the specific backup that you wish to restore.
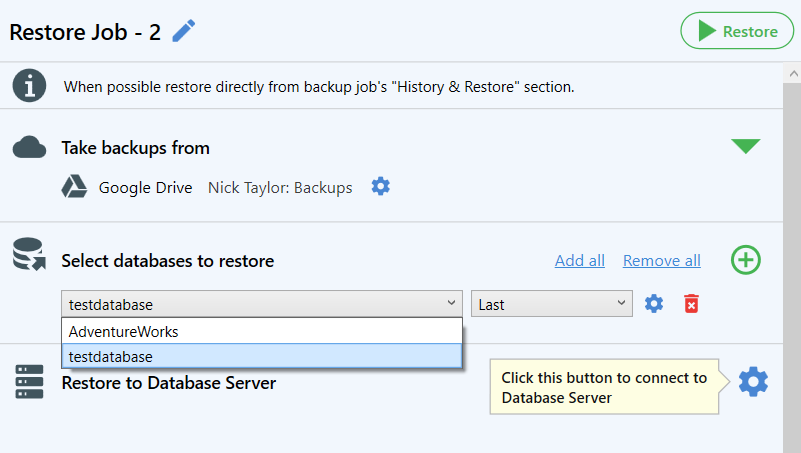
Select the database to restore - To set up the connection in your DBMS, follow these steps using the Azure SQL Server connection type. Specify the Server Name and provide the appropriate User Name and Password for the connection to connect to your SQL Server. Please ensure that you use the credentials for the SQL Server Authentication connection method.
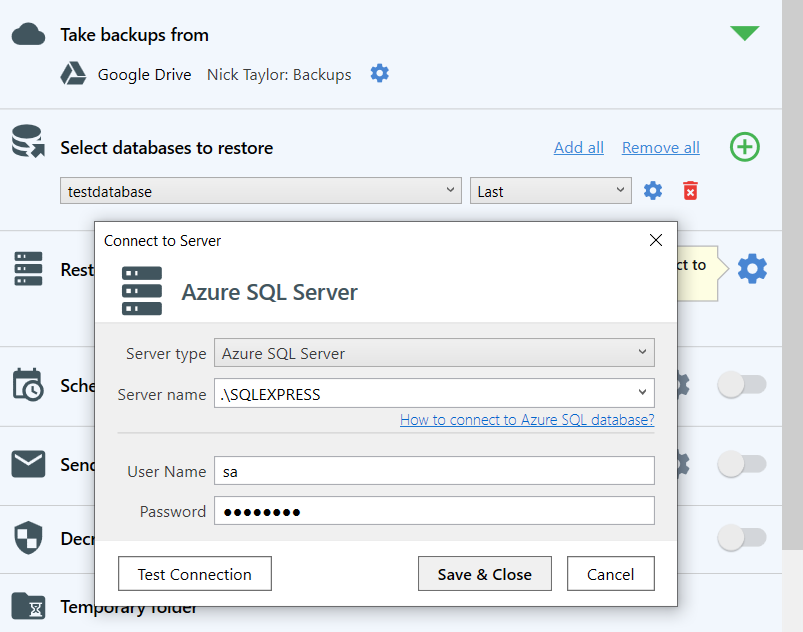
Connect to your SQL Server - If necessary, configure any remaining settings and initiate the restore job.
Now you are familiar with the process of copying data from Azure SQL to a local or remote SQL Server.